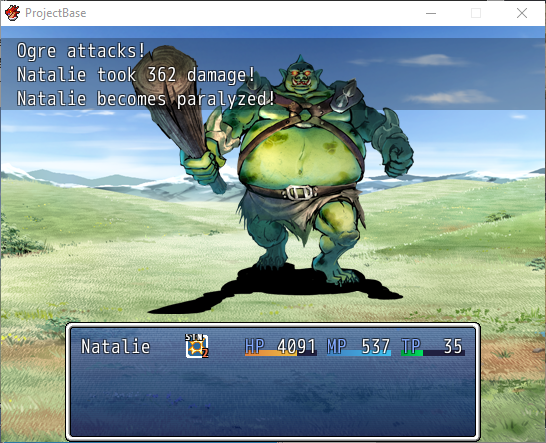
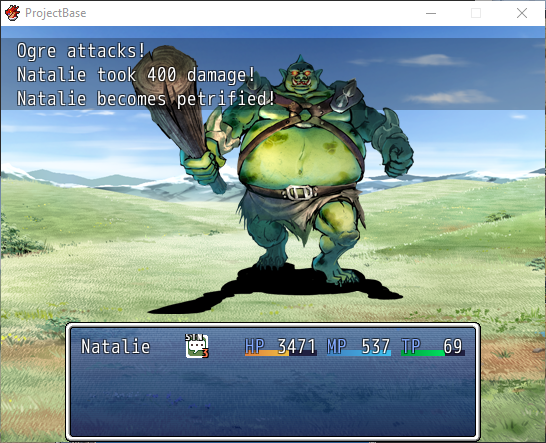
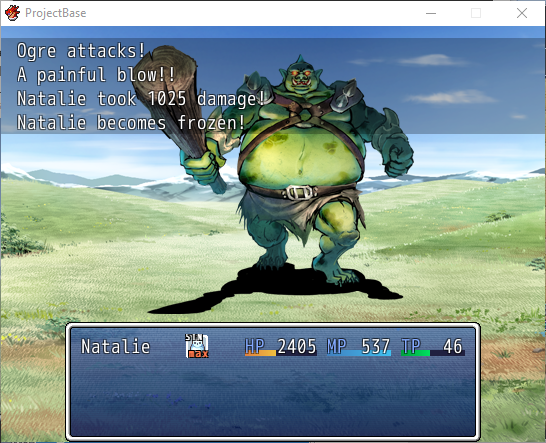
In this example, we’re going to link the Stun and Paralysis states so that being stunned while already stunned, inflicts the dreaded paralysis status effect. There’s a couple of ways to approach this with State Stages, so we’ll delve a bit into both. First we’re going to combine the states into a stage using the Staging States Hash within the script’s settings.
Code:
    #======================================================================
    # >> Staging States Hash
    # ---------------------------------------------------------------------
    # As of version 3.0, it is no longer required to set up state stages
    # using this hash, however, it can still be used along side notetags
    # for those upgrading from a previous version.
    #-
    # name => {:pos => [positive effect IDs], :neg => [negative effect IDs]}
    #-
    # name        - Can be any integer, string, or symbol.
    # :pos IDs    - The positive effect IDs of the states in your database.
    # :neg IDs    - The negative effect IDs of the states in your database.
    #-
    # You may exclude :pos or :neg from the hash if you so choose.
    # You may also use :neu to indicate that the state is neither good or bad.
    #======================================================================
      States = { # Do Not Edit This Line

        :nil => {:pos => [], :neu => [], :neg => []}, # Copy/Paste

      } # Do Not Edit This Line
We’ll name this stage
STN, short for ‘stun’ and add the state IDs as a negative type. A quick peek at the database reveals that the ID for Stun is 8, and the ID for Paralysis is 7. When using the Staging Hash, ID should always be placed from left to right, good to best, bad to worst.
Code:
    #======================================================================
    # >> Staging States Hash
    # ---------------------------------------------------------------------
    # As of version 3.0, it is no longer required to set up state stages
    # using this hash, however, it can still be used along side notetags
    # for those upgrading from a previous version.
    #-
    # name => {:pos => [positive effect IDs], :neg => [negative effect IDs]}
    #-
    # name        - Can be any integer, string, or symbol.
    # :pos IDs    - The positive effect IDs of the states in your database.
    # :neg IDs    - The negative effect IDs of the states in your database.
    #-
    # You may exclude :pos or :neg from the hash if you so choose.
    # You may also use :neu to indicate that the state is neither good or bad.
    #======================================================================
      States = { # Do Not Edit This Line

        :nil => {:pos => [], :neu => [], :neg => []}, # Copy/Paste
        :STN => {:neg => [8, 7]}, # Stun to Paralysis

      } # Do Not Edit This Line
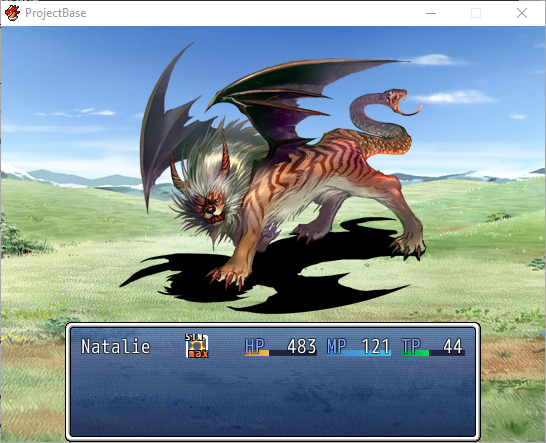
If you can believe it, we’ve already accomplished our goal. Due to the way staging works, when our actor is paralyzed, directly or through multiple stuns, we’ll get a display like this.
Protected download
Now, what if we wanted staging to continue? Let’s say that the effects of paralysis can actually get worse. Let’s add another two states to the staging, one will be called Petrified, which act as a longer lasting paralyze, and the final state will be Frozen, which lasts forever unless removed. We could approach this by creating said states within the database and link them to the
STN stage me made earlier, or… we can use notetags.
Protected download
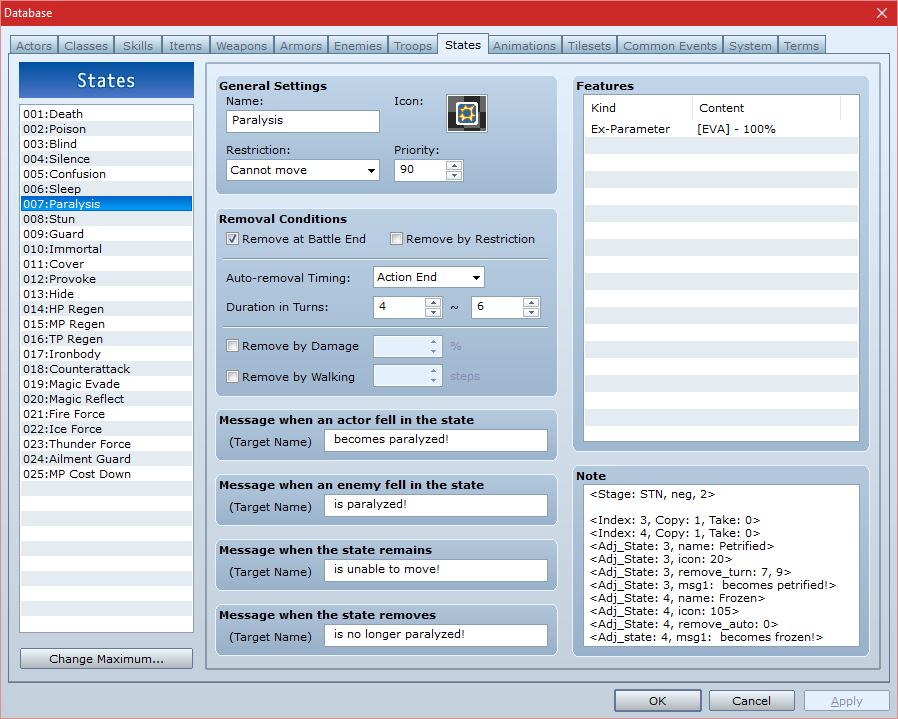
Alright, let’s walk through this notetag setup. On the very first line is the most important notetag, it must be included when creating states this way. It basically creates a new staging hash OR simply references a staging hash that already exists. We’ve done the latter hear and it’s important not to make any mistakes.
STN is the name we gave our staging hash previously, and neg is the type that states were put under. The 2, is the index number, meaning ‘the second state within the stage’, in this case our second state is ID 7, the Paralysis state that’s in the screenshot. We have correctly referenced this stage, it’s a good idea to turn the Debugger option on when setting up stages this way, just in case.
<Index: 3, Copy: 1, Take: 0> and
<Index: 4, Copy: 1, Take: 0> are the notetags used to create entirely new states based on a parent state. In this case, the parent state is Paralysis shown above. With this, all of the data from this state is duplicated and added to a new state with a different state ID. That state ID is then added to the staging hash based on the index; 3 and 4 in this case. Keep in mind that Stun is under index 1, and Paralysis is under index 2. The Copy and Take portions of the notetag refer to the Features lists of this Paralysis state. Copy: 1 means that the first feature (the only feature shown) will be copied over to the new state. If we were to set Take: to 1, then the feature would be copied to the new state and removed from this Paralysis state.
The
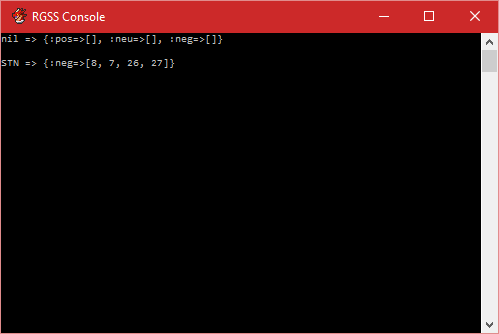
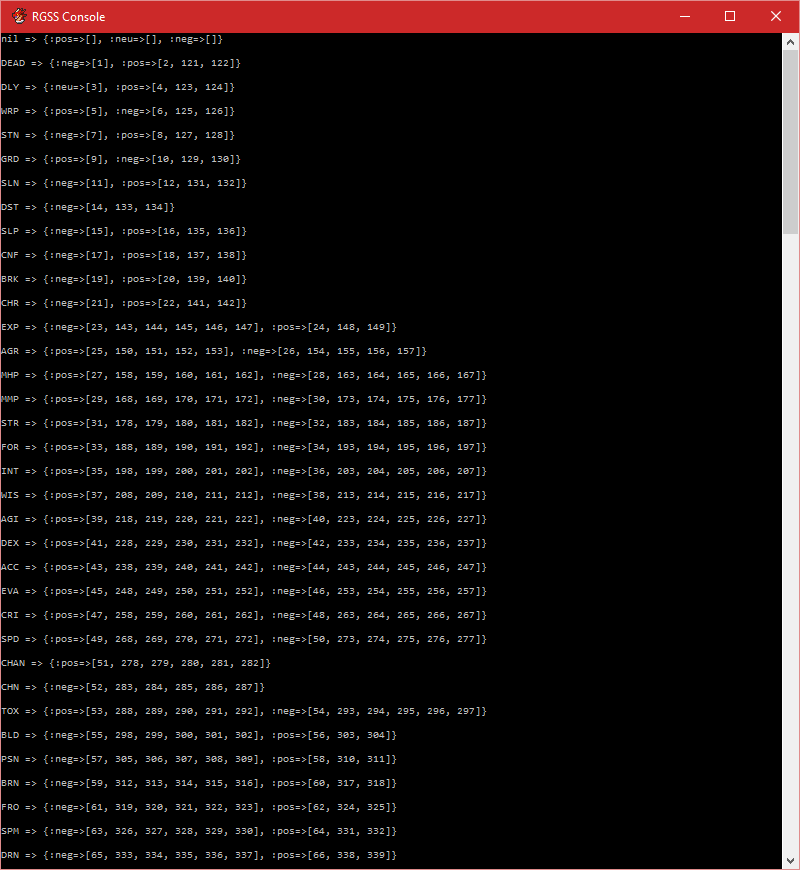
<Adj_State> notetags are used to modify the newly created states. In the example above, we change the names, icon indexes, state removal turns, and the ‘Message when an actor fell in the state’ values. This is important for differentiating one stage from another. Before we do a test battle, let’s activate the Debugger and see what our staging hash looks like.
Protected download
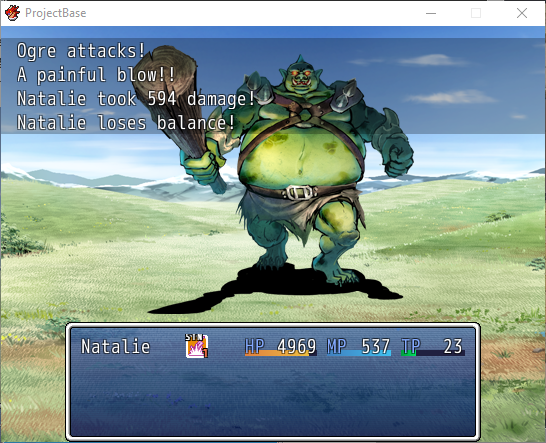
As you can see, our stage now includes two additional state IDs. Note that the ID numbers will always be outside of the maximum range of your state database. Since the maximum (seen in the example above) was 25, states created by notetags would begin at 26 and continue from there. If you’ve attempted something like this and ended up with an entirely new staging hash… something went wrong. Anyway, let’s see how this look in-game. Since state icons are only displayed for actors by default, I had an ogre beat-up on Natalie until I got the shots I needed.
Protected downloadProtected downloadProtected downloadProtected download
That covers the basics. More detailed instructions can be found within the script’s header. I’ll stress once again that developers should make full use of the debugger option within the script’s settings while working on staging. Here’s an example of many staging states within a project. Enjoy!
Protected download



 7-in-2 USB-C Multiport Adapter for MacBook Pro and Air
Slim USB-C hub for HDMI, USB, card access, and everyday laptop expansion.
View on Amazon
7-in-2 USB-C Multiport Adapter for MacBook Pro and Air
Slim USB-C hub for HDMI, USB, card access, and everyday laptop expansion.
View on Amazon