Simple Fog Event Tutorial for RPG Maker VXAce
BMM_Archive · July 15, 2026

Original Source
- Original title: Simple Fog Event Tutorial for RPG Maker VXAce
- Original author: Imploded Tomato
- Original date: September 17, 2012
- Source thread: https://forums.rpgmakerweb.com/threads/simple-fog-event-tutorial-for-rpg-maker-vxace.4933/
- Source forum path: Game Development Engines > RPG Maker Tutorials > RMVXAce Tutorials
Summary
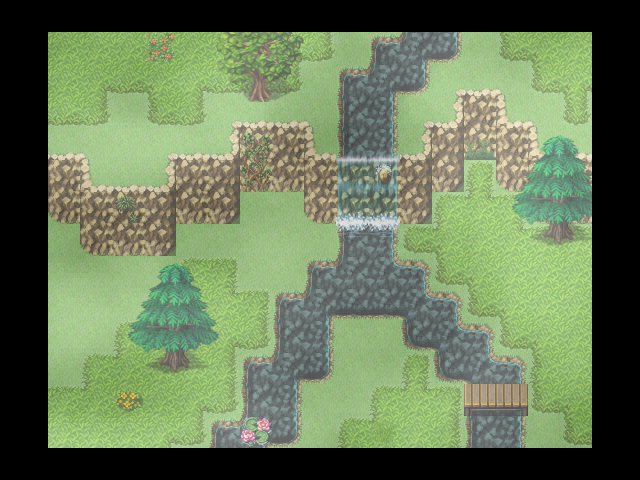
When I first tried RPG Maker VXAce, I could not help but to wonder why there was no options for fog in the events like in RPG Maker XP. This is a simple tutorial to show how you can create fog for your maps using RPG Maker VXAce. Lets get started. You will need two things. 1.) A fog graphic that has been imported into your pictures folder for your project. 2.) A two paged Event that will display the fog. I have supplied a fog graphic for you to...
Archived First Post
1.) A fog graphic that has been imported into your pictures folder for your project.
2.) A two paged Event that will display the fog.
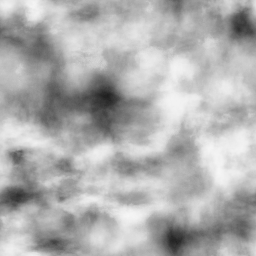
I have supplied a fog graphic for you to use.
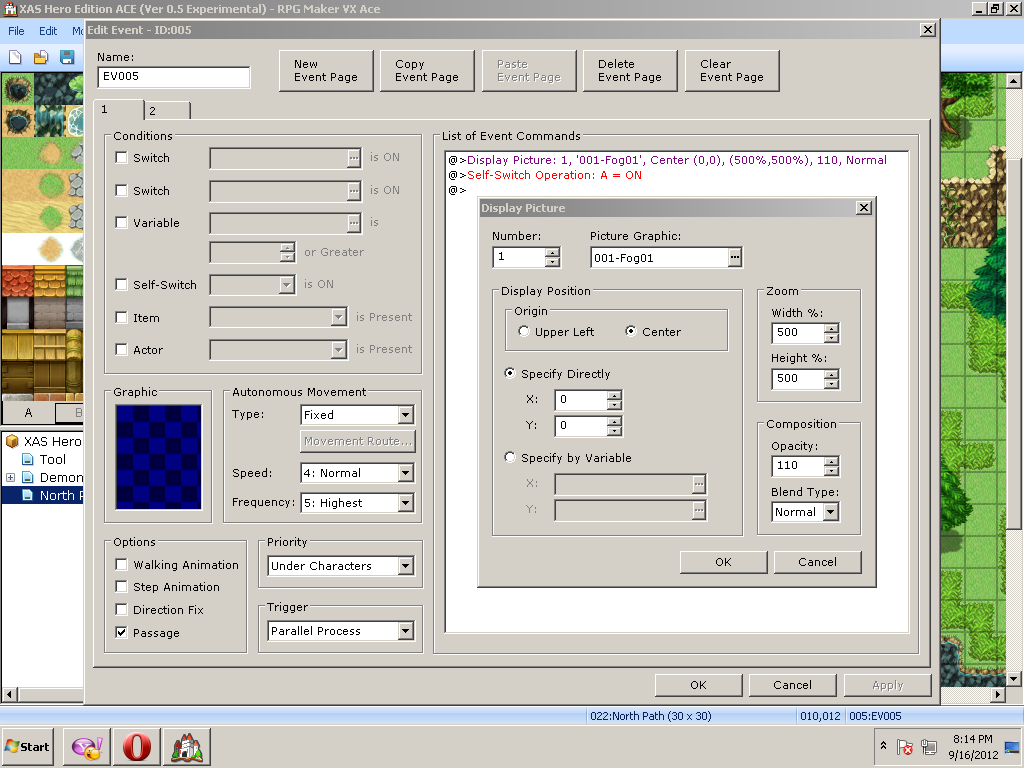
After you import your fog graphic to your pictures folder. Create a event on a map. As shown in the Example 1 Screen Shot. You will need to select "Display Picture". On the "Display Picture" options make sure select your fog graphic. Under the "Display Position" select the "Center Tab". Under "Zoom" Select 500 for width and 500 for height. Under "Composition" set the "Opacity" to 110 to give the fog that transparent look. Then create self switch A as well as a new page.
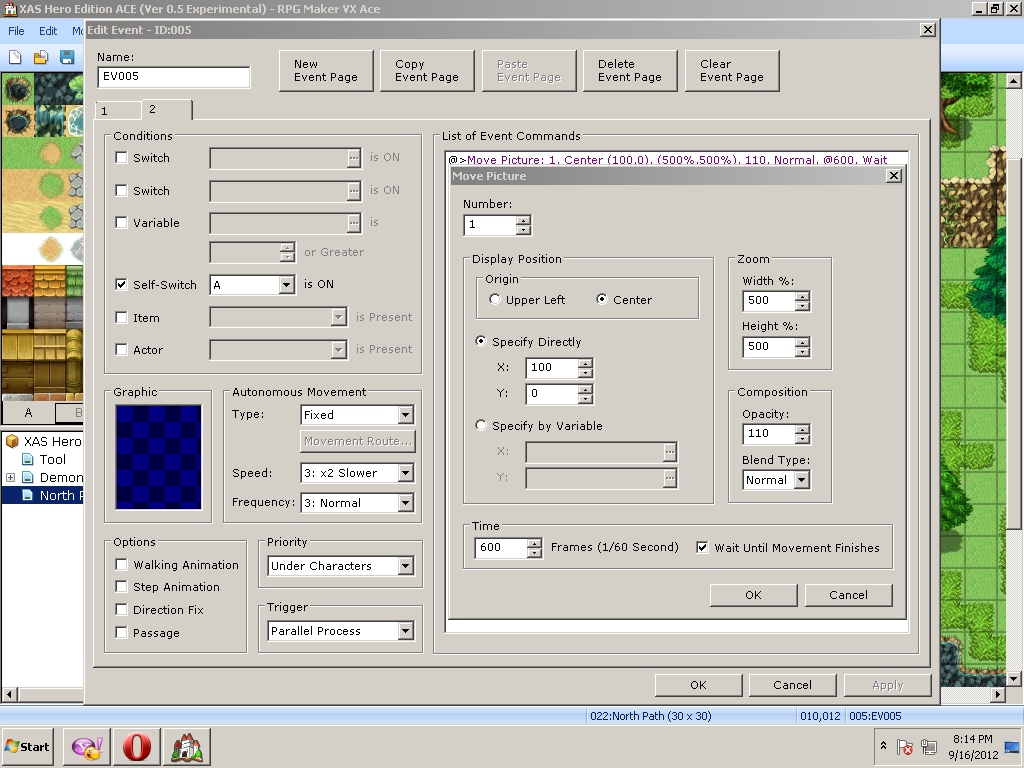
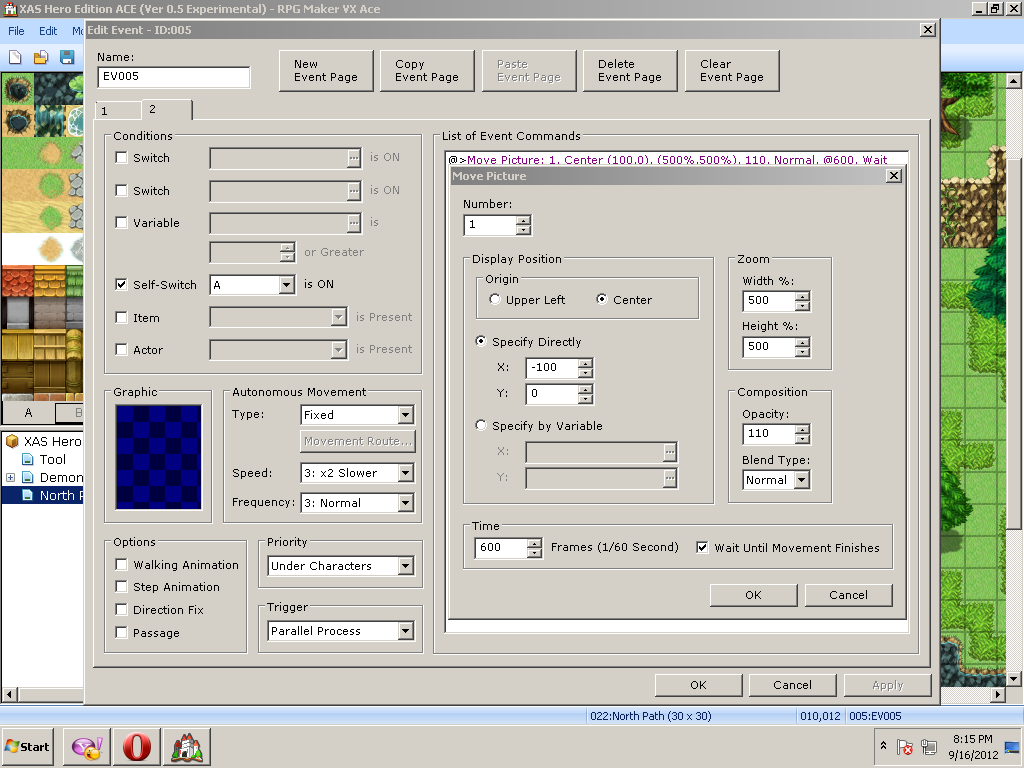
On your second page make sure self switch A is ON under the "Conditions" tab as shown in Example 2. The next event will involve moving the fog graphic. Under "Picture and Weather Effects" select "Move Picture". Under "Zoom" Select 500 for width and 500 for height. Under "Composition" set the "Opacity" to 110. Next under the "Specify Directly" option set "X" to 100 . Set the time to 600 frames then press okay.
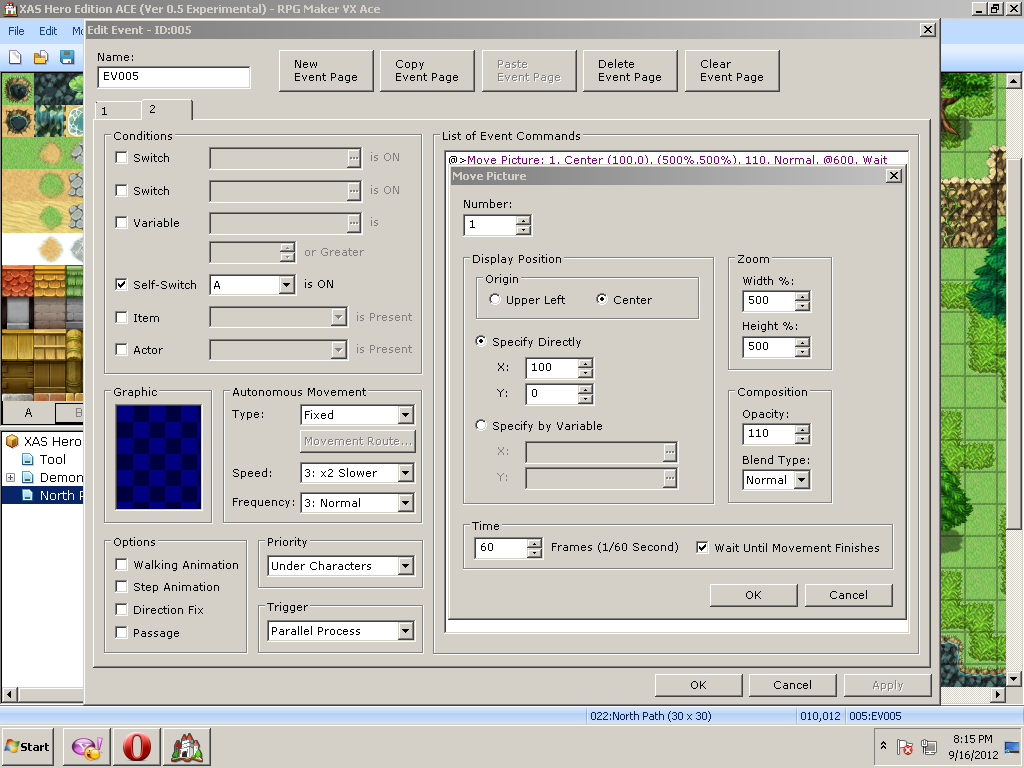
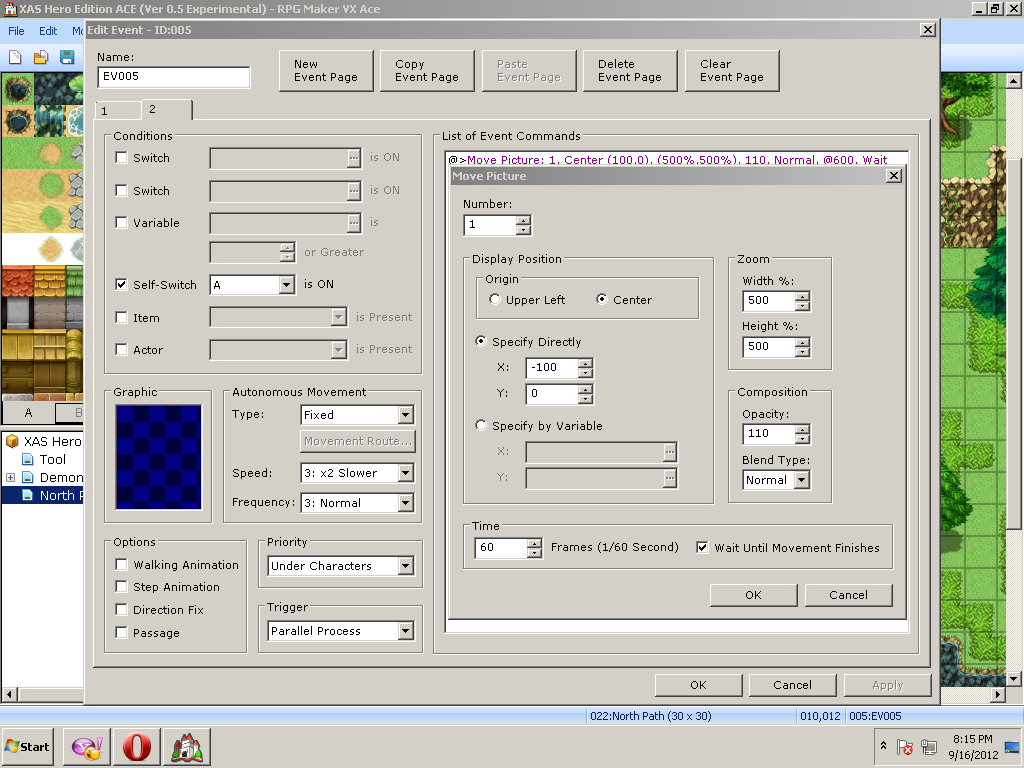
Now copy and past your "Move Picture" 3 times, you should have a total of 4 "Move Picture" functions on your second page. For your second "Move Picture" function change the "Time" to 60 instead of 600 frames as shown in Example 3. For your third "Move Picture" function change the "Time" to 600 and change the "X" coordinates to -100, this will cause the fog graphic to move back and forth.
And finally for your last "Move Picture" function just change "Time" to 60. On the Event Page under "Trigger" select Paralell Process so that the fog will loop, click okay and test.
You can change the zoom and opacity settings as well as the X and Y coordinates to give the fog a different look and feel. This concludes this tutorial, hope you enjoyed it and learned something new. Happy Gaming!
- Encrypted Knight
Protected download
Protected download
Protected download
Protected download
Protected download
Protected download
Protected download
Downloads / Referenced Files
Log in, then follow the RPG Maker Developers Group to see these download links.
Log in to downloadReferenced Images / Attachments
Creator Claims / Removal
If you are the original creator and want this listing reassigned, edited, or removed, join BMMPlay and contact the moderators with proof that matches the original RPG Maker Web profile, linked GitHub, itch.io page, or another public creator identity.
Replies (0)
No replies yet.
Topic Summary
Loading summary...