


[STV] Tutorials | Teleport Scroll
BMM_Archive · July 16, 2026

Preserved forum archive. This topic stores the original first post and locally mirrored RPG Maker Web attachments when available. It is posted by the BMMPlay archive account, not by the original creator.
Original Source
- Original title: [STV] Tutorials | Teleport Scroll
- Original author: Skotty TV
- Original date: October 24, 2016
- Source thread: https://forums.rpgmakerweb.com/threads/stv-tutorials-teleport-scroll.70092/
- Source forum path: Game Development Engines > RPG Maker Tutorials > RMMV Tutorials
Summary
STV Tutorials Teleport Scroll -------------------------------------------------------------------------------------------------------------------------
Archived First Post
STV Tutorials
Teleport Scroll
-------------------------------------------------------------------------------------------------------------------------
The following tutorial will teach you how to create a Teleport Scroll
almost like in the Diablo series.
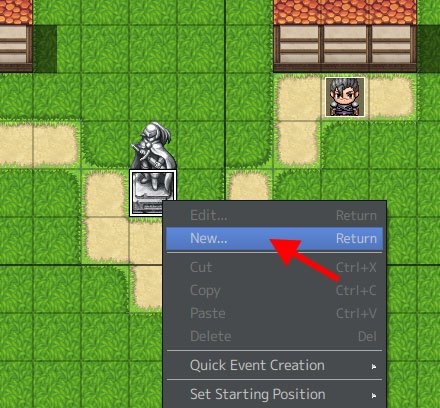
Step 1:
- Rightclick anywhere on the Map where you want your Bindstone to be
- Leftclick on "New..."
Protected download
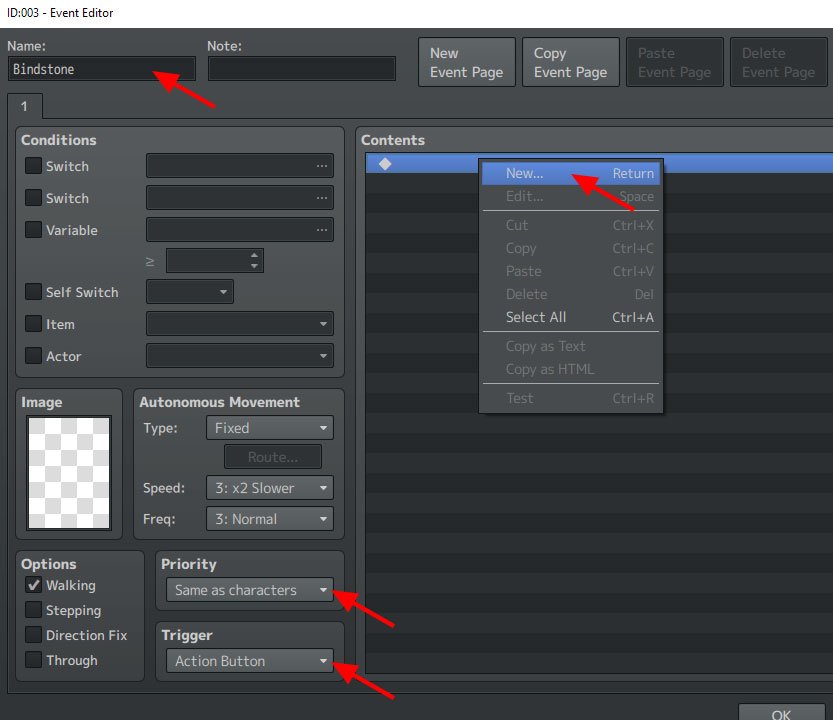
Step 2:
- Name your Event for example "Bindstone"
- Rightclick at the "Contents" part and Leftclick "New..."
Protected download
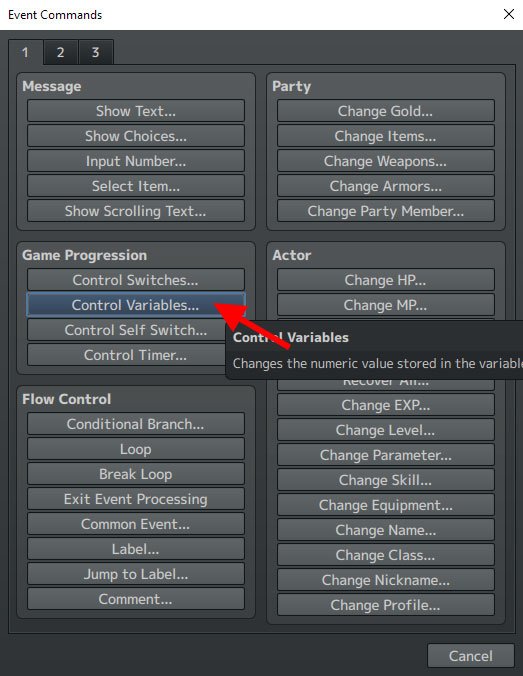
Step 3:
- Leftclick on "Control Variables..."
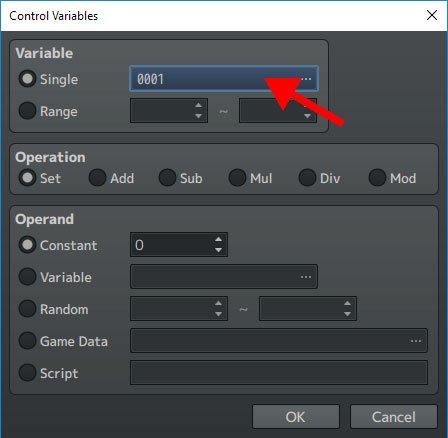
- Inside the Control Variables Leftclick on "Single" (0001) ...
Protected downloadProtected download
Step 4:
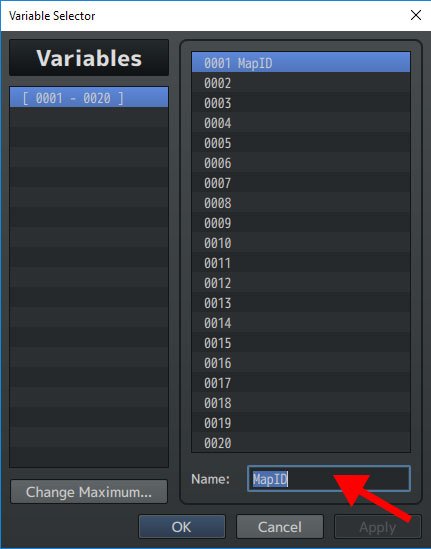
- Choose a Variable Number you like and name it "MapID"
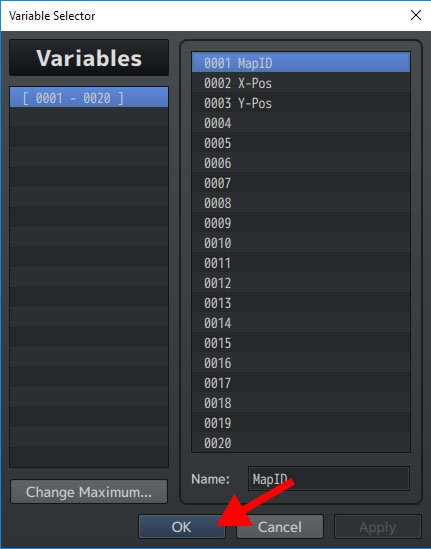
- Do the same with two other Variables and name them "X-Pos" and "Y-Pos"
- Mark the first Variable "MapID" again then hit "Apply" and "OK"
Protected downloadProtected download
Step 5:
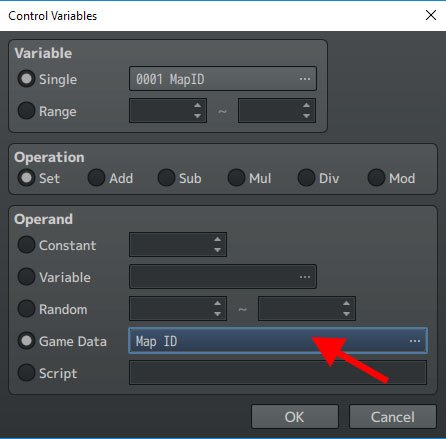
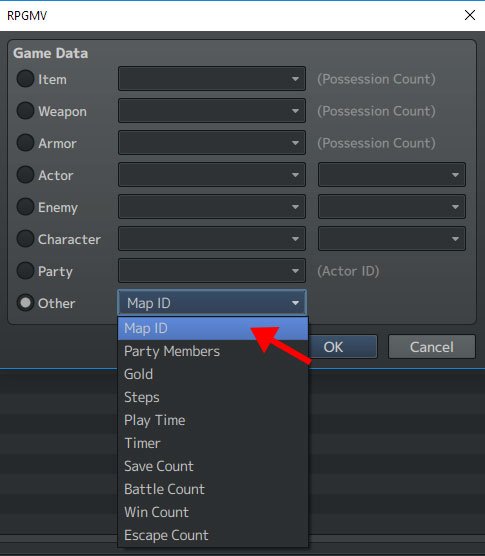
- Under "Operand" click on "Game Data"
- Select "Other" and click on "Map ID"
- Hit OK, Hit OK
Protected downloadProtected download
Step 6:
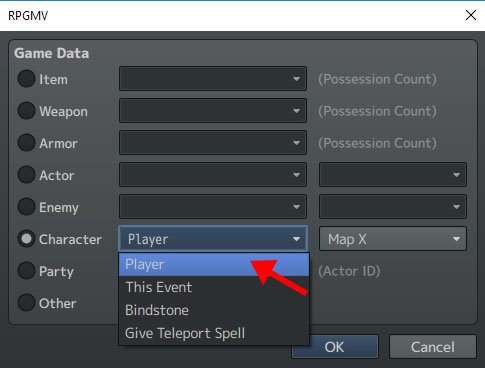
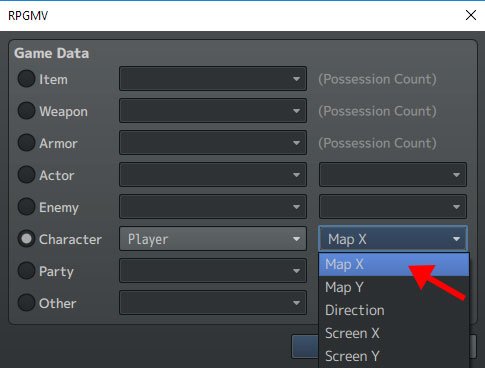
-Do the same as in Step 5 but now for "X-Pos" and "Y-Pos"
-For that select "Character" and then "Map X" and "Map Y"
Protected downloadProtected download
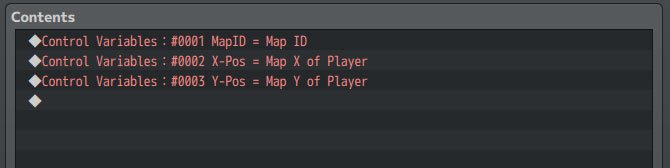
It should now look like this:
Protected download
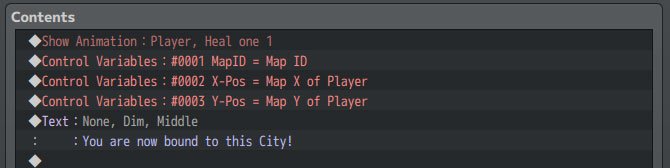
You can also put more to it like Animation and Show Text:
Protected download
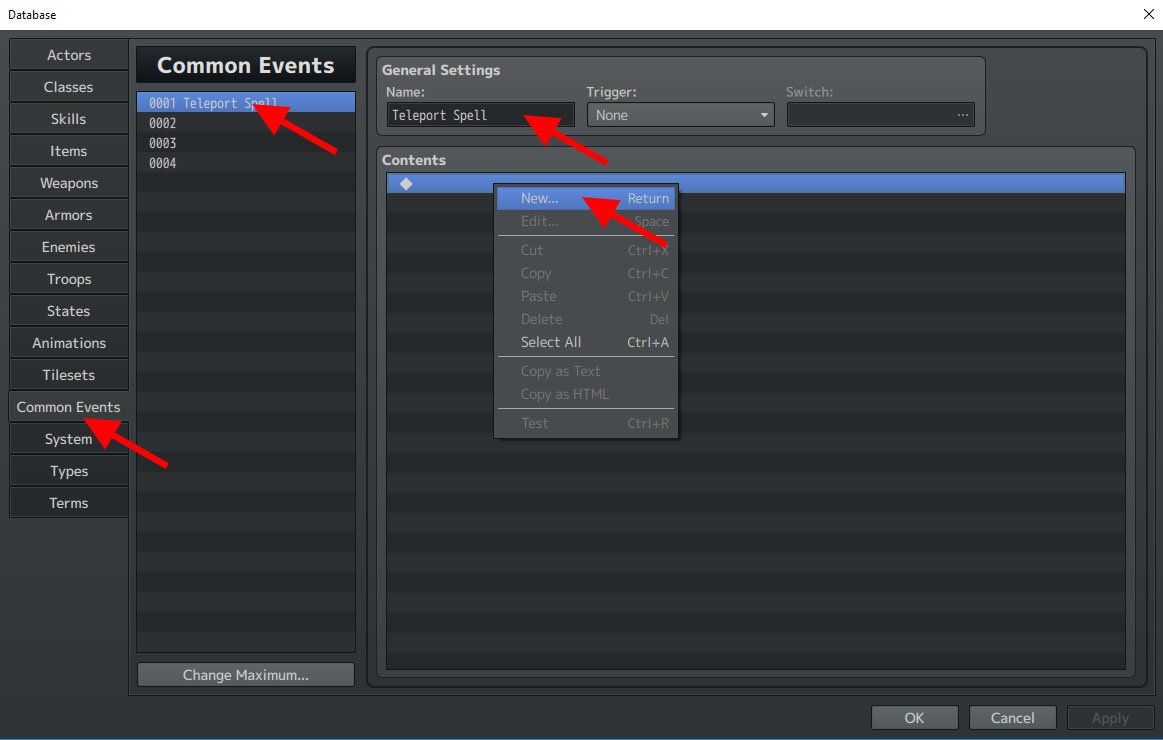
Step 7:
- Go to your "Data Base" and click on "Common Events"
- Select a Common Event you like and give it a name
- Rightclick at the "Contents" section and Leftclick on "New..."
Protected download
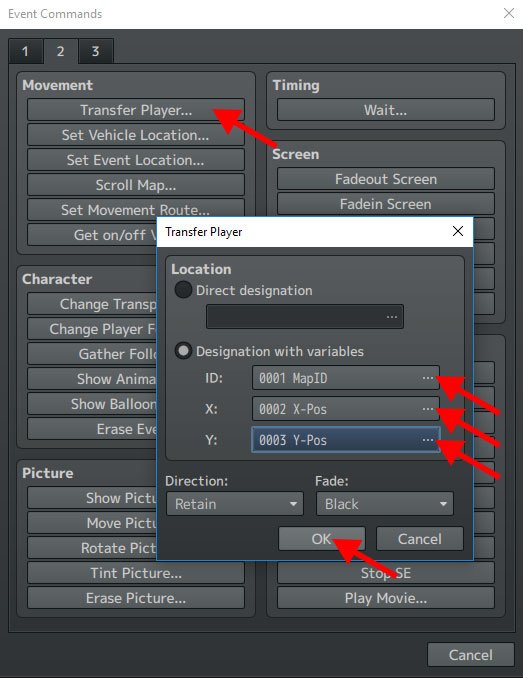
Step 8:
- Go to Page 2 and click on "Transfer Player..."
- Select "Designation with variables" and insert the Variables you set up in Step 6
- Hit "OK"
Protected download
It should Now look like This:
Protected download
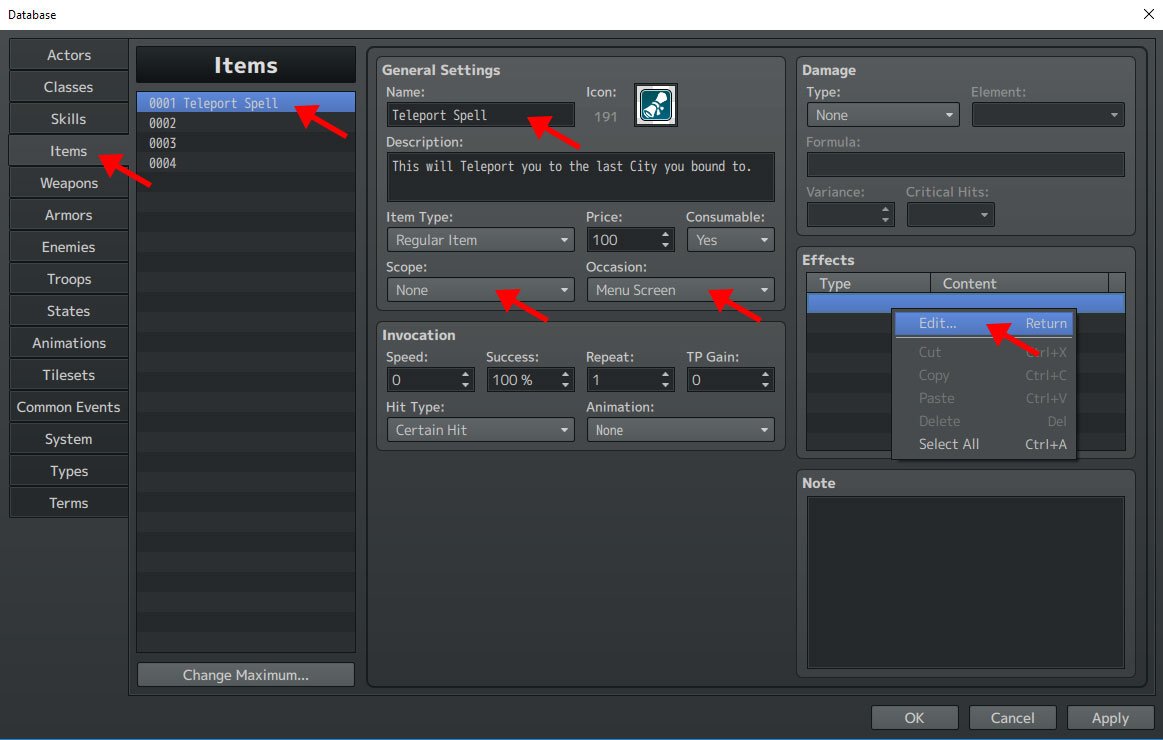
Step 9:
- Go back to your "Data Base" and click on "Items"
- Select any Item you want, name it, set Scope to None and Occasion to Menu Screen
- Rightclick at the "Effects" section and Leftclick on "Edit..."
Protected download
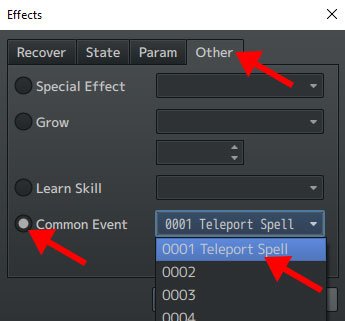
Step 10:
- Click on the Register "Other" and select "Common Event"
- Now select the Common Event you created in Step 7 and hit "OK"
- Done!
Protected download
-------------------------------------------------------------------------------------------------------------------------
If you think this was helpfull please give a like!
Stay Cool! BD
Downloads / Referenced Files
Log in to download
Log in, then follow the RPG Maker Developers Group to see these download links.
Log in to downloadReferenced Images / Attachments

Creator Claims / Removal
If you are the original creator and want this listing reassigned, edited, or removed, join BMMPlay and contact the moderators with proof that matches the original RPG Maker Web profile, linked GitHub, itch.io page, or another public creator identity.
Replies (0)
No replies yet.
0
replies
7
views
Topic Summary
Loading summary...

