

public

Rpg Maker Developers Group

Simple enough for a child, powerful enough for a developer

2 Followers

Tree-Making Tutorial

BMM Archive · July 16, 2026

Preserved forum archive. This topic stores the original first post and locally mirrored RPG Maker Web attachments when available. It is posted by the BMMPlay archive account, not by the original creator.

Original Source

  • Original title: Tree-Making Tutorial
  • Original author: Pyromantic
  • Original date: April 26, 2016
  • Source thread: https://forums.rpgmakerweb.com/threads/tree-making-tutorial.60990/
  • Source forum path: Game Development Engines > RPG Maker Tutorials > Non-Maker Specific Tutorials

Summary

{ "lightbox_close": "Close", "lightbox_next": "Next", "lightbox_previous": "Previous",

Archived First Post

Protected download


Pixel Art Tree Tutorial


When I first started out doing pixel art I couldn’t find a good tutorial on how to make trees. So now that I’m a bit better, I’ve decided to make my own! 


For this tutorial, you’ll need some sort of digital art program. You probably shouldn’t be looking at digital art tutorials if you don’t have a digital art program. I use Pro Motion, but I’m pretty sure that Gimp and Photoshop work too. 


Step One: Basic Shape


So first things first, we’ve got to make the general shape of the tree. 

tumblr_inline_o65w48kzdm1rvvj98_500.png

I did this by taking a circular brush and making a bunch of lumpy circles, arranged a in vaguely pyramidal shape. My current color palette (One whole color!) is up in the right corner there.


Simple and easy, right? So, moving on…


Step Two: Basic Light and Shading

tumblr_inline_o65w91SCP81rvvj98_500.png

Now you’ve got to get the basic shading down, too. The tree should be made up of a bunch of (slightly disfigured) spheres overlapping each other. Don’t shade in perfectly straight lines - look at how the different blocks of color contour in the shape of a sphere.


But don’t stress too much about getting the shading perfect. You’re mostly just making a guide for yourself later. It doesn’t have to look perfect.


Step Three: Detailed Shading

tumblr_inline_o6612zKT7p1rvvj98_500.png

Now we have to get into the nitty-gritty parts of the shading. You’ll want to switch your brush to a small size. The one I was using wasn’t anything fancy - it was just a four-pointed “star,” shown below:

tumblr_inline_o65wttIjOL1rvvj98_250.png

(In Pro Motion, it’s the smallest circle brush.)


Start with the darkest shade that you’re using for that portion of the tree. (Always work from dark to light. Light casts shadows - so naturally the shadows go underneath the light.). Make short quick strokes up into the second darkest shade. Switch to the color you’re using for your second darkest shade, and repeat the process with short, quick strokes into the third darkest shade. 

tumblr_inline_o65x74baZg1rvvj98_500.png


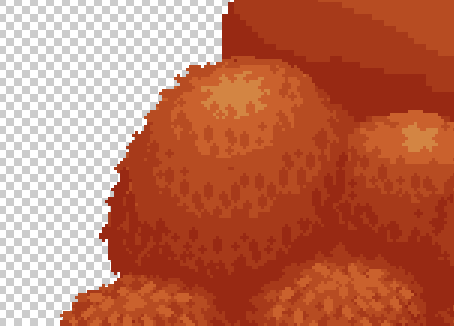
That’s what it looked like for me when I was finished. You don’t have to follow any particular pattern or strategy, but be careful to keep to the contour guide you made in Step Two. Try to concentrate on the edges of the shape, since less light will hit those, which means they should be darker.


I added the darkest shade I’ll use during this step - used this shade for to outline the bottom of the lowest clumps on the tree, just to make it stand out a little more from the other tiers.


(Side note - You could potentially stop here, if you want a simpler, more cartoony and abstract style of tree. Not everything has to strive for photo realism, especially pixel art.)


Step Four: Detailed Lighting

tumblr_inline_o66159IzJi1rvvj98_500.png

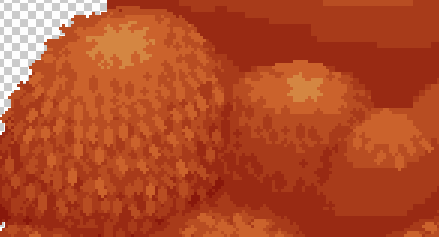
Now that the shading’s done, we’ve got to start on the lighting. The method for this is pretty similar to the method for shading - small brush, short strokes, mixing the different blocks of color together. Only difference is now you’re into the color block beneath. So, select your second darkest shade, and make quick short strokes into your darkest shade. Then select third darkest, and move into second darkest. Etc, etc.

tumblr_inline_o65y3k5Jn01rvvj98_500.png


The clump on the left shows the finished product - what you’ll get when you’ve finished both lighting and shading. The middle lump is shading only, without the lighting yet. And the right lump is lighting with no shading - you should NOT have this at any point in your project. Always do shading first, then lighting over of the shadows. But the right clump shows you what sort of brush stroke I’m using - the same that I used for the shading.


Step Five: Hell


Now, do that entire process all over every sphere on your tree. Yes, this’ll take a bit of time, but there really isn’t a short cut if you want a complex looking tree.

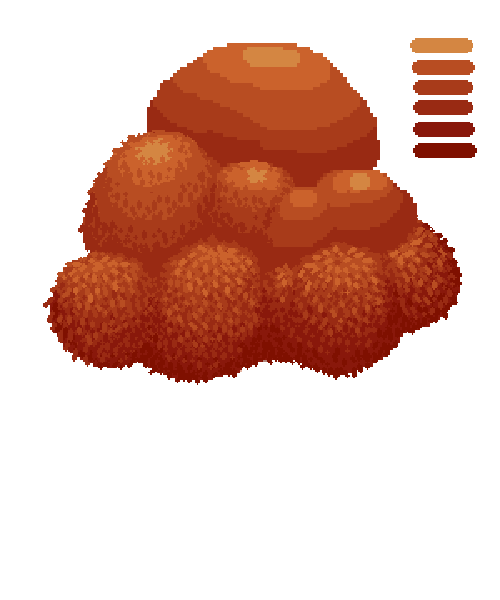
tumblr_inline_o65yav0Boq1rvvj98_500.png

On this step I added my lightest color, a golden yellow to use as a highlight on the highest sphere on the tree. 


Step Six: Come back from Hell and make minor fixes

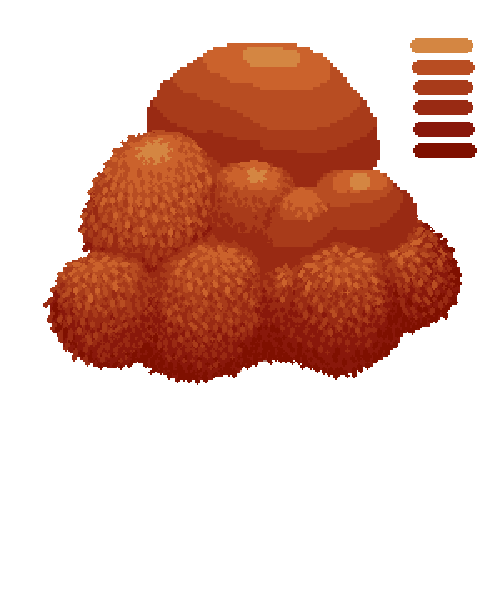
tumblr_inline_o660uwz2BH1rvvj98_500.png

Now you’re mostly finished - add a few final touches to complete it. One issue I noticed was that my tree looked a little too lumpy, so lightened up the creases between the different spheres a bit.

tumblr_inline_o65yvkL9dZ1rvvj98_500.png


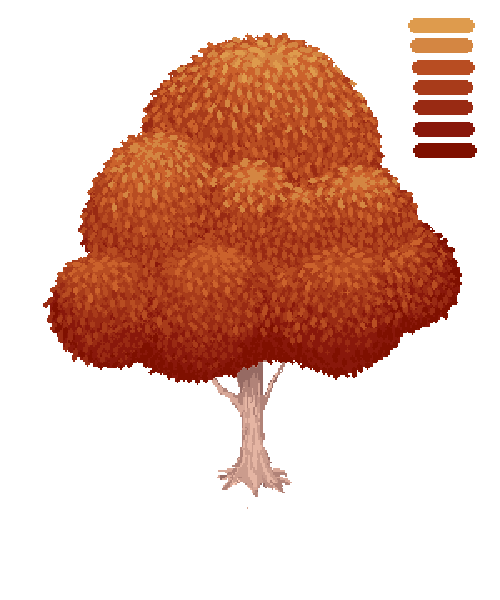
This is also a good time to add a trunk. Unless your trees are floating. In which case, um, props for originality, I guess.

tumblr_inline_o65ywynCiP1rvvj98_500.png


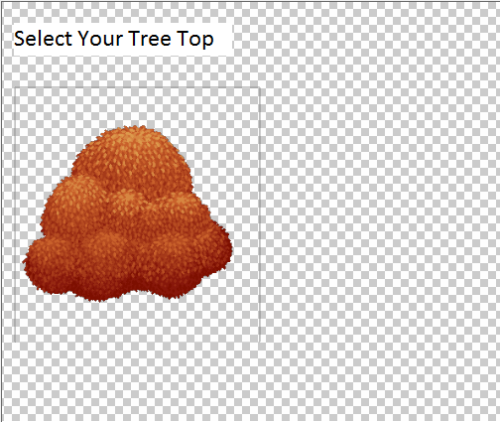
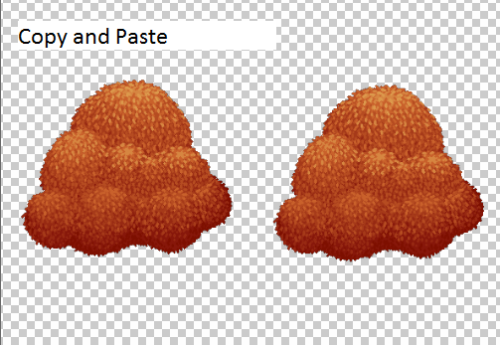
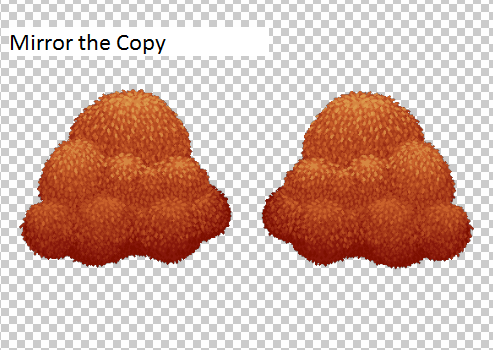
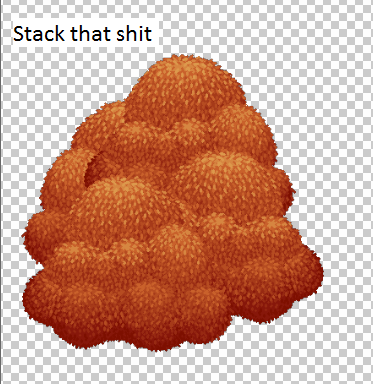
“But wait a minute, Pyro!” You probably aren’t shouting at your computer screen. “This process is so long, and the tree I need is huge! I can’t do this for the whole thing!” Well let me show you some fancy-pantsy pixellated witchcraft, friend. 

tumblr_inline_o65zecPhRc1rvvj98_500.png
tumblr_inline_o65zgwshuA1rvvj98_500.png
tumblr_inline_o65zjwdmmi1rvvj98_500.png
tumblr_inline_o65znyT9Zp1rvvj98_400.png


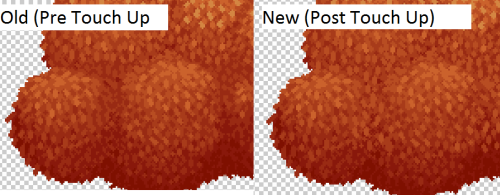
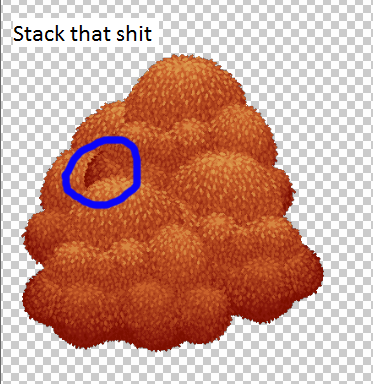
Spheres, as it turns out, are pretty hard to tell apart. Stacking a few treetops on top of each other can easily multiply the size of the tree without sacrificing too much quality (Or time and effort for that matter.) You might have to do some minor touch ups to get it to look right - for instance, this bit of red right here:

tumblr_inline_o65zzqXm6f1rvvj98_400.png


That would probably have to be drawn over, to make it look more in line with the rest of the tree - the shadow shouldn’t be so deep right there.


Now that that’s out of the way, let’s move onto the last and final step:


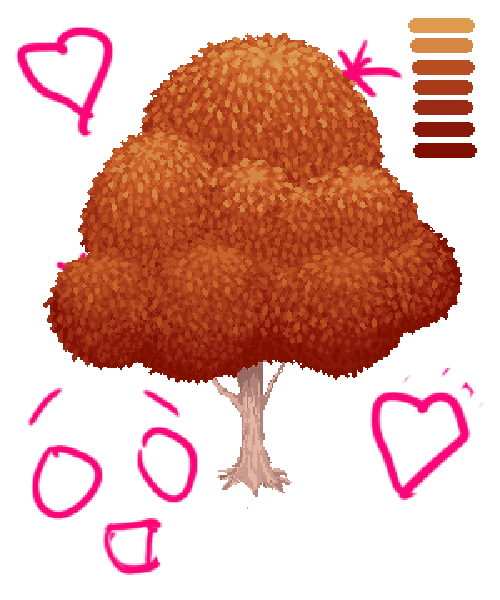
Step Seven: Add Some Hearts and Smiley Faces in Photoshop

tumblr_inline_o65yy88SsN1rvvj98_500.png


Perfect. Ten outta ten.

Downloads / Referenced Files

Log in to download

Log in, then follow the RPG Maker Developers Group to see these download links.

Log in to download

Referenced Images / Attachments

output_ZhYLy1.gif
output_ZhYLy1.gif
tumblr_inline_o65w48kzdm1rvvj98_500.png
tumblr_inline_o65w91SCP81rvvj98_500.png
tumblr_inline_o6612zKT7p1rvvj98_500.png
tumblr_inline_o65wttIjOL1rvvj98_250.png
tumblr_inline_o65x74baZg1rvvj98_500.png
tumblr_inline_o66159IzJi1rvvj98_500.png
tumblr_inline_o65y3k5Jn01rvvj98_500.png
tumblr_inline_o65yav0Boq1rvvj98_500.png
tumblr_inline_o660uwz2BH1rvvj98_500.png
tumblr_inline_o65yvkL9dZ1rvvj98_500.png
tumblr_inline_o65ywynCiP1rvvj98_500.png
tumblr_inline_o65zecPhRc1rvvj98_500.png
tumblr_inline_o65zgwshuA1rvvj98_500.png
tumblr_inline_o65zjwdmmi1rvvj98_500.png
tumblr_inline_o65znyT9Zp1rvvj98_400.png
tumblr_inline_o65zzqXm6f1rvvj98_400.png
tumblr_inline_o65yy88SsN1rvvj98_500.png
Creator Claims / Removal

If you are the original creator and want this listing reassigned, edited, or removed, join BMMPlay and contact the moderators with proof that matches the original RPG Maker Web profile, linked GitHub, itch.io page, or another public creator identity.

#rpg-maker-archive#generic-tutorials

Replies (0)

No replies yet.

0 replies 1 view

Log in to reply.

User Avatar