 Introduction
 ͞ ͞ ͞ ͞ ͞ ͞ ͞ ͞ ͞ ͞ ͞ ͞
 Create Lines between player to event, follower to event, event to event
 or map coordinates (x,y) in tiles or pixels.


 How to Use
 ͞ ͞ ͞ ͞ ͞ ͞ ͞ ͞ ͞ ͞
 There are some scriptcalls you can use to make it clean, easy and
 best of all, user-friendly and efficient.

 There are 3 ways to set it up!

 $gameScreen.setLine(connect, options)

 connect:
   => There are 2 ways for connect the sources
   1) Characters connect is using an array [A, B]

        0 = player
      < 0 = followers
      > 0 = event ID

 Example:
   $gameScreen.setLine([0, 3])    //=> player ↔ event 3
   $gameScreen.setLine([-2, 7])   //=> follower 2 ↔ event 7
   $gameScreen.setLine([2, 5])    //=> event 2 ↔ event 5

 You can use options to customize the line:
   pixel, zIndex, width, color, progress, speed, alpha and pulse.

 Example:
   $gameScreen.setLine([2,5], {width: 2, color:0x00ff00, alpha: 1});

 zIndex:
    Sets the line priority, higher values appear above lower values.
    Default is 0.

 width:
    The thickness of the line (default is 2)

 mode:
    Determines how the line is animated.
       "progress" = line is drawn over time.
           The initial progress of the line (0 → 1). Default is 1 (instant).
           Can be used to start the line partially drawn.

       "pulse"    = line continuously grows and shrinks in width.
           Enables a pulsing width animation.
           The value is the maximum additional width applied during the pulse cycle.

           width: 2, pulse: 2  //=> 2px ↔ 4px
           width: 2, pulse: 3  //=> 2px ↔ 5px

    Default is "none".

 speed:
    Controls the animation speed.
       mode: "progress"
           Number of frames required to draw the line completely.

       mode: "pulse"
           Number of frames required to expand from the base width
           to the maximum pulse width.

 color:
    The color of the line in hex: "#FF0000" or 0xFF0000, as both works
    The default color is white (0xFFFFFF)

 alpha:
    The alpha color, which by default is 1


   2) Coordinates connects is using an object array [{x:n, y:n},{x:n, y:n}]
      This can also go in 2 ways, by tiles or by pixels (default false)

      By default, pixels is false, meaning: coordinate by tiles.

 Example:
    Start at Map X 4, Y 6 and end at X 10, Y 48:
    $gameScreen.setLine([{x:4,y:6}, {x:10,y:48}])

    Start at Map X 210, Y 30 and end at X 700, Y 300
    $gameScreen.setLine([{x:210,y:30},{x:700,y:300}], {pixel:true});

    pixel:
      true  = pixel coordinates
      false = map tiles

    With all options (optional):
    $gameScreen.setLine([{x:50,y:50},{x:500,y:500}], {
       pixel:true, zIndex:1, width:4, pulse:3, speed:120, color:0x00FF00, alpha:0.7});


   3) Besides connecting character to character, or Map coordinates,
      you could also connect events to map coordinates.

 Example:
    $gameScreen.setLine([0, {x:8, y: 10}])    //=> player ↔ Map Coordinates
    $gameScreen.setLine([0, {x:8, y: 10}], {color: "#00FFFF"})


 Remove Lines between map coordinates:

 Example:
    $gameScreen.removeLineCoords({x:4, y:6})

    This removes all lines, connected to that map coordinate.


 Removing Lines between connections is relative easy as well.

 Example:
    This require an start point and end point (can be used reversed)

    $gameScreen.removeLinesBetween(disconnect)

    Sample for characters:
    $gameScreen.removeLinesBetween([3,5])
    $gameScreen.removeLinesBetween([5,3]) => same effect as above

    Sample for map coordinates:
    $gameScreen.removeLinesBetween([{x:3,y:5},{x:10,y:20}])
    $gameScreen.removeLinesBetween([{x:10,y:20},{x:3,y:5}])  => same effect as above

    Sample for character and map coordinates:
    $gameScreen.removeLinesBetween([6,{x:10,y:20}])
    $gameScreen.removeLinesBetween([{x:10,y:20},6])  => same effect as above

    If Multple was connected to the same point, remove one line between them.


 Removing a Line from one source can break all others.

 Example:
    You have a connect A to B, A to C, A to D, D to E

    $gameScreen.removeLine(source)

    Removes ALL lines connected to the source.
    Remaining nodes stay connected to each other.

    Sample:

    $gameScreen.removeLine(2);

    This removes all lines connected to event 2


 To remove all lines, use the following line:

    $gameScreen.removeAllLines();


 Pixel Distance
 ͞ ͞ ͞ ͞ ͞ ͞ ͞ ͞ ͞ ͞ ͞ ͞ ͞ ͞
 Check the console log for the pixel distance and use
 the following scriptcall:

 Example:
   $gameScreen.lineInPixels(sourceA, sourceB, pixels)

 souceA / sourceB: check the distance between map coords or characters.
                   (player, followers, events)
 pixels (optional): default is false, and only works for map coordinates
                   when using pixels.


 To check the map coordinates (tiles) distance in pixels:
   $gameScreen.lineInPixels({x:1, y:4}, {x:5, y:6})

 To check the map coordinates in pixels:
   $gameScreen.lineInPixels({x:32, y:128}, {x:64, y:192}, true)

 To check the characters distance in pixels (player, followers, events):
   $gameScreen.lineInPixels(3, 12)


 In order to use it in a conditional branch to check if its true or false
 if map coordinates (tiles) to event id 12 is lower than 96 pixels distance.

   $gameScreen.lineInPixels({x:1, y:4}, 12) < 96


 Or if you use map coords in pixels:

   $gameScreen.lineInPixels({x:32, y:128}, 12, true) < 96


 Use the console log first to see the actual pixel distance.
 This makes creating pixel-based conditions easier and more accurate.




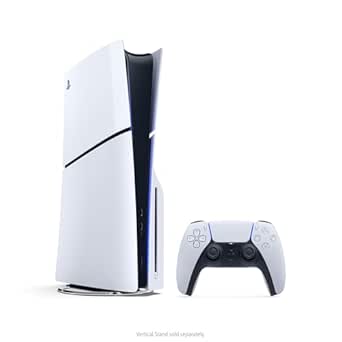 PlayStation 5 Disc Edition Console (slim)
Disc-version PS5 console pick for players building or upgrading a PlayStation setup.
View on Amazon
PlayStation 5 Disc Edition Console (slim)
Disc-version PS5 console pick for players building or upgrading a PlayStation setup.
View on Amazon