Greetings makers! ThreeSixNine here, bringing you my very first tutorial! This tutorial highlights how I use Yanfly's Weapon Unleash Plugin (which is a paid plugin), as well as a custom function added through a small plugin, to replace the standard attack skill with a modified attack skill based on which type of weapon the user has equipped. This tutorial will go over a few different aspects and how they combine to create this system;
Greetings makers!
ThreeSixNine here,
bringing you my very first tutorial! This tutorial highlights how I use
Yanfly's Weapon Unleash Plugin (which is a paid plugin), as well as a custom function added through a small plugin, to replace the standard attack skill with a modified attack skill based on which type of weapon the user has equipped.
This tutorial will go over a few different aspects and how they combine to create this system;
1. I'll briefly cover some of the basics of damage formulas and link to a thread that goes into greater detail on the subject.
2. I'll go over the plugins used and link a video on how to install them, as this method will not work without them. This section will also cover how to add a custom function through a self-made plugin.
3. I'll introduce and break down the formulas and how they differ by weapon type.
4. I'll get into how and why I think this system suits my current project.
A few things to note before we get started:
-This tutorial only covers the basic attack skill.
-Prior Javascript knowledge is not necessary, but it will definitely help.
-Most importantly, this tutorial is designed to show how to:
- Import a new function into your project in the form a plugin.
- Use the function in a damage formula that does not directly reference defense to reduce incoming damage.
- Use a second plugin to replace the basic attack skill with a custom attack skill, based on the users equipped weapon.
- Use the damage formula to assign a set damage range, consistent across all weapons of a given type.
- Treat the target's base defense like an armor class, checking it against the user's base strength, to see if the user is even physically capable of damaging the enemy with their "basic attack".
Part 1: The Basics
Let's begin by inspecting the elements of the default attack skill in the database:
This is an image of the damage control box of the basic
Attack skill, found under the
Skills tab of the database. We will inspect each element in detail:
View attachment 134775
Type: sets the damage type of the skill.
Note -
HP Damage is the only type used in any formula provided in this tutorial.
None - use for any skill that is not meant to deal damage or heal
HP Damage - Deals damage to HP
MP Damage - Deals damage to MP
HP Recover - Recovers HP
MP Recover - Recovers MP
HP Drain - Deals HP Damage to target and recovers HP to the user, essentially combining HP Damage and HP Recover
MP Drain - Deals MP Damage to target and recovers MP to the user, essentially combining MP Damage and MP Recover
Element: Sets the elemental attribute of the skill.
Note - Normal Attack will reference any elemental properties of the user's equipped weapon and is the only type used by any formula provided in this tutorial.
Formula: The input field for the damage formula. The code input here will decide the damage or healing output of the skill.
Note - There is no character limit to the input field.
"a.atk" references the total attack value of the user, where "a." references the user of the skill and "atk" references the total attack parameter.
"b.def" references the total defense of the target, where "b." is used to reference the target of the skill and def references the total defense parameter.
This simple equation first multiplies the total attack value of the user by 4, then multiplies the target's defense by 2 and then subtracts the defense from the attack to decide the final damage.
Variance: Variance allows the skill to do a range of damage within a given percentage over or under the calculated value of the formula.
Note: formulas provided in this tutorial have a 0% variance by default method. Any variance is handled in the formula itself.
Critical Hits: Determines if the skill can critical, dealing 300% of normal value. Set to 'Yes' or 'No'.
Note - all formulas in this tutorial are set to 'No'
If you're having any questions at this point, check out
Damage Formulas 101 before moving on. The information I found there has been immeasurable in helping me get to where I am now.
Part 2: The Plugins
-Installing Plugins-
If you're unfamiliar with installing plugins, check out this
Video first. You can also navigate to Yanfly's plugin listing from this page, if you intend to purchase and use the plugin.
Once you're familiar with installing a plugin file, you can start the process of creating your own mini plugin that will add the new Javascript function to your project. I will outline the process before going into detail about each step. The process will have five steps:
- Create a new file in any text editor
- Copy the funtcion into the new file
- Save the file
- Move the file.
- Import the file into your project.
Upon completing these steps, your project will be able to utilize a new function to generate a random number from within supplied minimum and maximum values.
But first, let's take a look at our function's code:
Code:
Math.range = function (min, max) {
    min = Math.ceil(min);
    max = Math.floor(max);
    return Math.floor(Math.random() * (max - min + 1)) + min;
};
'
Math.range' is based on a function that generates a random number within a supplied minimum and maximum value, both of which are included in the calculation.
Example; Math.range(1, 10); generates a random number between 1 and 10. This function creates the core of our damage formula and is precisely what gives the weapons a specified damage range, but more on that later.
Note- Math.range is not a default javascript function and will not work in MV without adding through a plugin.
-Creating a new text file-
For the first step, navigate to your desktop, right click an and select 'new' then 'text document'. Locate your new text file on your desktop and open it. It should be a completely blank text file.
-Copying Code-
Now, copy the code form the 'Math.range' spoiler above, then copy it into you blank text file.
It should look something like this:
-Saving the file-
Next, click file and choose save as. Save the file as 'MathRange.js'. Don't forget '.js' at the end of the file name. Close the file.
If you watched the linked video for installing plugins, the next two steps should be familiar.
-Moving the file-
Open your project and navigate to the project folder, under the 'Game' tab:
Open the js folder, then open the plugins folder. Copy the newly saved 'MathRange.js' from the desktop to the plugins folder.
-Importing the file-
Return to your project and open the plugins manager. Click an empty slot and find MathRange.
Done! Now you can use Math.range in your project!
-Yanfly's Weapon Unleash Plugin-
Here's the info on the plugin, straight from Yanfly's page:
-Introduction-
"This plugin allows your game to be able to replace the Attack and Guard
commands or give them the option of having a skill randomly occur when using
them in reference to Golden Sun's Weapon Unleash system!
When replacing the Attack and Guard commands, the text can be changed out
for the command names as well. These replacements aren't limited to just
equipment in origin, but also from actors, classes, enemies, equipment, and
states, too!"
-Understanding Notetags-
Notetags
 RPG Maker MV
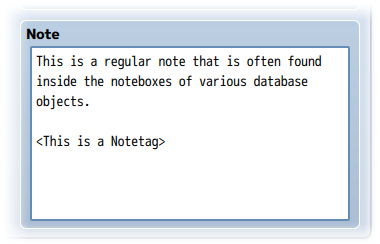
's editor is unable to allow for custom traits/properties that a game dev may wish to associate with a database object, event, map, etc. Notetags are used to work around such limitations by allowing the game dev to tag certain traits/properties using specific Notetags declared by the related plugin.
There's a few notetags you can use to replace the default attack and provide
any weapon unleash effects. Note: If you're using notetags that write out
the skill's name and you have multiple skills in your database with the same
name, priority will be given to the skill with the highest ID.
Actor, Class, Enemy, Weapon, Armor, State notetags:
--- Replace Attack ---
<Replace Attack: x>
<Replace Attack: name>
This will replace the attack skill used by the battler. If a battler would
have multiple attack replacements, priority will be given in the following
order in a first-come-first-serve aspect:
States - Highest to Lowest Priority
Equipment - In order of equip list
Enemy Aspect
Class Aspect
Actor Aspect
Skill Notetags:
<Command Text: x>
<Attack Text: x>
<Guard Text: x>
If you are using Replace Attack or Replace Guard, you can change the way
the command name appears in the actor command window to x. If you are
using the <Command Text: x> notetag, this will apply to both Attack and
Guard names.
For this tutorial we will be only be focused on only two notetags,
<Replace Attack: x>
and
<Attack Text: x>
<Replace Attack: x>
<Replace Attack: name>
This will replace the attack skill used by the battler. If a battler would
have multiple attack replacements, priority will be given in the following
order in a first-come-first-serve aspect:
States - Highest to Lowest Priority
Equipment - In order of equip list
Enemy Aspect
Class Aspect
Actor Aspect
Note- While the <Replace Attack> notetag can be used on any of the aspects mentioned above, we will only be using them on weapons.
<Attack Text: x>
If you are using Replace Attack you can change the way
the command name appears in the actor command window to x.
Note- The <Attack Text> only applies to skills.
Note- The number in the <Replace Attack> notetag corresponds to the number of the skill being used to replace attack for the tagged weapon, 15 for swords, 16 for daggers, 16 for maces and so on.
Note- All skills being used to replace tha basic attack skill will have <Attack Text: Attack> tagged to them. This is to keep consistent naming regardless of which actual skill is being used. This also makes it easier to know which skill is being used for each weapon.
Part 3: The Formulas
Now that we've got our plugins installed, we can start putting them to work. Here is my formula for the attack skill an actor will have when equipping a sword:
Code:
a.paramBase(2) >= b.paramBase(3) ? Math.range(a.paramPlus(2), (a.paramPlus(2) + 10)) : Math.range(1, a.paramBase(2));
First, I'll break down down each element of the formula:
'a.paramBase(2)' references the user's base attack value, which is their attack without any equipment factored in.
'b.paramBase(3)' references the base defense of the target.
'Math.range' generates our random number
'a.paramPlus(2)' references the user's bonus attack value, which is the total attack added from any equipment, NOT including the base value.
Note - By adding attack to an actor through weapons only, we can always reference the attack value of the equipped weapon this way. If your actor has any other gear that adds attack, that will be added to the plus value.
' + 10' adds 10 points to the attack plus value when it's used as the max value for the Math.range function.
Note - By swapping out X for another number in paramBase(X) or paramPlus(X) you can reference other parameters:
0 - Max HP
1 - Max MP
2 - Attack
3 - Defence
4 - Magic Attack
5 - Magic Defence
6 - Agility
7 - Luck
Next, I explain how those parts come together to create the complete the process:
This formula utilizes what is know in javascript as a '
conditional (ternary) operator'.
The ternary operator has 3 parts, or operands:
- A condition followed by a question mark - in this case "a.paramBase(2) >= b.paramBase(3) ?"
- An expression that executes if the condition is true, followed by a colon - "Math.range(a.paramPlus(2), (a.paramPlus(2) + 10)) : "
- An expression that executes if the condition is false - "Math.range(1, a.paramBase(2));
So when we put it all together, we get this process:
Check if the user's base attack is higher than the target's base defense; if yes, run the first expression, if not, run the second expression.
Note - "Math.range(a.paramPlus(2), (a.paramPlus(2) + 10)) : " is where we get our damage range.
Let's look at an example:
Harold's attack at lvl 1 is 10, Harold has a sword equipped that grants another 20 attack, that makes his base 10 and his plus 20 and his total 30. Harold then enters a battle with a bat with 10 defense and a slime with 30 defense. Now that we have some values, lets see what happens when Harold attacks each enemy, starting with the bat. inputting the number values into the formula we get:
10 >= 10 ? Math.range(20, (20 + 10)) : Math.range(1, 10);
Since 10 is greater than or equal to 10, we know the first condition will run to determine damage. Math.range will generate a random number between 20 and 20 + 10 and deal that damage to the bat.
Now for the slime:
10 >= 30 ? Math.range(20, (20 + 10) : Math.range(1, 10);
Since 10 is not greater than or equal to 30, we know the second expression will determine the damage.
Harold will only do between 1 and 10 damage to the slime.
This formula allows the base defense parameter to function more like an armor class and the base attack parameter to function like a strength stat. Simply, if the target's armor class is higher than the user's strength, the attack will do minimal damage.
Part 4: The Reason
Another feature of this formula is that it allows weapon types to have a consistent range of damage, linked to their assigned attack value. Swords will always have a range of 10 damage above the value entered into the editor. Daggers have a + 4 range, simply by changing '+ 10' to '+ 4'. This kind of consistent scaling allows the player to quickly and easily familiarize themselves with the damage capabilites of each weapon.
While this only covers the basic attacks of the actors for now, I feel like it's a decent starting point for class-based skills as it sets the ground work for things like using the base values of certain stats as modifiers as well as giving me a better idea of the amount of damage any skill will do to any given enemy at any point in the game.
I've had a few ideas about how to apply this to the more magic-based classes;
Maybe swapping their attack out for a skill that would make sense for a mage, maybe a generic, non elemental spell that is free to cast and could also generate a small amount of mp.
Finally, I want to highlight that this is just one of
countless possibiliies when considering damage formulas and plugins. Damage formulas can add a great deal of depth to even the standard battle system. Even without any plugins whatsoever, damage formulas should not be overlooked as one of the more dynamic features.
I do understand that this specific setup is not going to work for everyone, and that's absolutely okay, but I am hoping that maybe this can shed some light on just what kind of things can be achieved by leveraging damage formulas.
Until next time




 PlayStation DualSense Wireless Controller - White
Extra DualSense controller for couch co-op, backup play, or PC and mobile sessions.
View on Amazon
PlayStation DualSense Wireless Controller - White
Extra DualSense controller for couch co-op, backup play, or PC and mobile sessions.
View on Amazon