Hi everyone! I'm not sure if I'm the only one who finds the default animations in RPG Maker to be sort of choppy. But it has always bothered me. And recently I came across Spriter. It's a 2d skeletal animation software. Using this, we can easily create smoother animations. Well, there are other programs like Spine, dragon bones but personally I find spriter to be very easy to use. In this tutorial, I'll show you how to make smoother, longer and more complicated animations using spriter. I'm fairly new to it so I might be wrong in some cases but I'm hoping this will come to be useful to someone.
What you'll need:
1.Spriter (There's a pro version available but you can also get the free one. Either will do)
2.Photoshop
A plugin that allows more character frames. I prefer Galv's character frames
Step 1- Preparing the sprite
For animating your sprites, you will need to separate the sprite into parts such as head, torso, upper left arm, upper right arm, lower left arm, lower right arm etc etc whatever part you want to animate, you have to separate it.
I'm going to use Photoshop for this. In this tutorial, I will show you how to make a smoother walk animation. That's why I'm only going to show the animation for the down direction. We will need the idle pose.
we want to animate this character's walking motion. Now, separate the head, hair (if you want to animate the hair too... but I will not do it since it's a bit too complicated. But with more practice, you may be able to), torso, upper arm left,upper arm right, lower arm left, lower arm right, upper leg left, lower leg left, lower leg right, lower leg right.
Expand each part a little where the joint is so that when the part moves, the part underneath it has some color too.
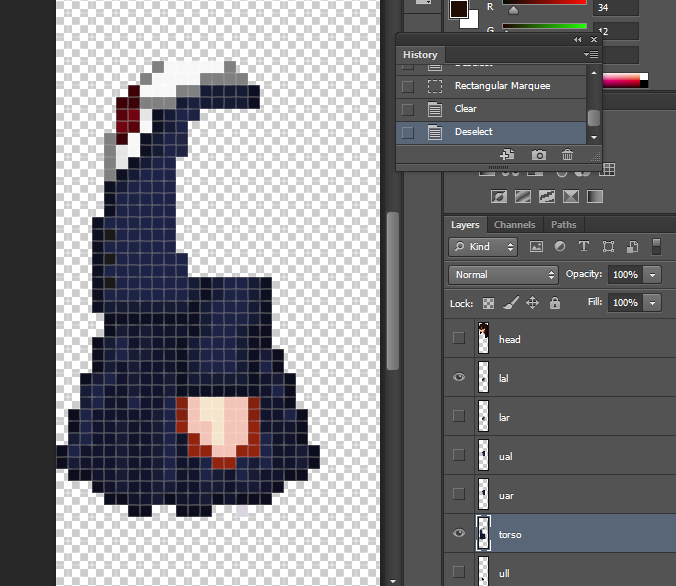
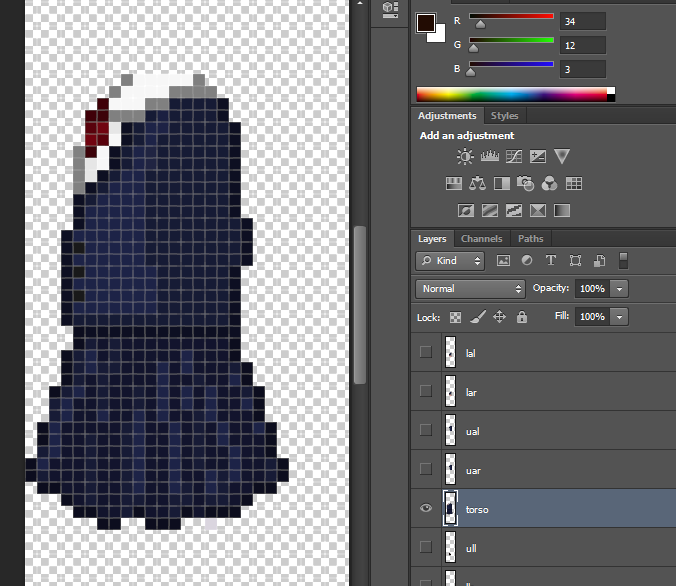
For example, here we have the main part of the body.No arms, no legs. Just the part that we won't animate. I have filled in the area under the arm with blue color. So that when the arm moves, that part won't remain transparent.
Similarly, we just separate the parts and extend them a little around the joints and underneath them.
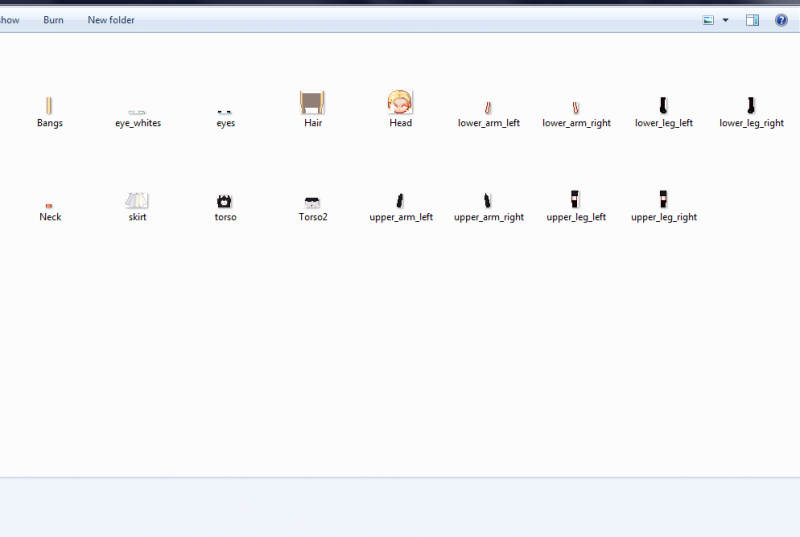
Name all the parts. Because you'll regret not doing so afterwards ^^Save the layers in a folder. It'll look like this
It's also a good idea to save the whole sprite as a png image too. You'll know why soon.
#0059b3">Step 2- Arranging the parts in Spriter
Open spriter and go to File--> New Project. Select the folder you just made where all the parts are.
Useful shortcuts:
Middle mouse button- pan
Mouse wheel-zoom
left click-select
Left click and drag- select more than one part
F-centre on the canvas
Alt + Drag and release- Create bones
B + Left click- Append to bone
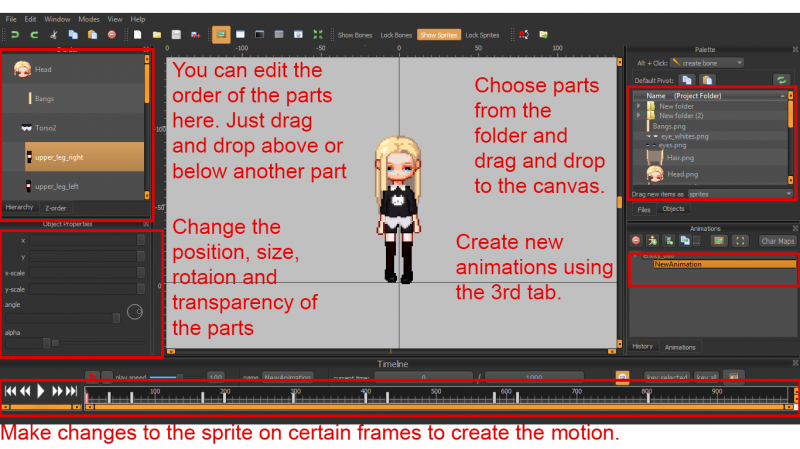
Now you'll see that all the parts are shown on the right side of the screen. Drag and drop the parts on the canvas. Bring in the guide first. Reduce the transparency on the left part of the screen. (There's a bar called alpha. Change the value there)Arrange the other parts over it. That way you can position the parts accurately. Once done, delete the guide image.
#0059b3">Step 3- Making bones and assigning parts to them
This part is very easy.Once you've arrange all the parts,
Alt + Left click and drag to create a new bone. I usually start with the torso.
Next, while this bone is still selected, make another bone for the neck/head. Again, while mother bone is selected, make another bone for the upper legs. Next while upper leg is selected, make a bone for lower leg. Doing this, all the bones are joined in order.
Now to join the parts to the bones, left click on the bone first. Then press B and left click on the part. Done! Rotate the bone and the part will move along with the bone.
#0059b3">Step 4- Animating
Make sure you are at frame 0. You can travel between frames by dragging the mouse along the timeline. Now... don't do anything. This is the staring frame which will contain the idle animation. I suppose you've arranged the parts to make up an idle pose so there's nothing to do here.
Move a few frames forward. I usually go to 200. Now make the necessary changes to make it look the character has taken a step forward. Here's what I did:
Moved the upper and lower right leg 3 px upward, rotated the lower right arm to look like in the picture, moved the whole sprite 3 px down.
Go to frame 0. Go to Edit-->Copy current Frame. Now go to frame 400, Edit-->Paste. Now the idle pose will be pasted here.
Go to frame 600 and repeat what we did before, this time for the left leg and right arm. The result will look like this
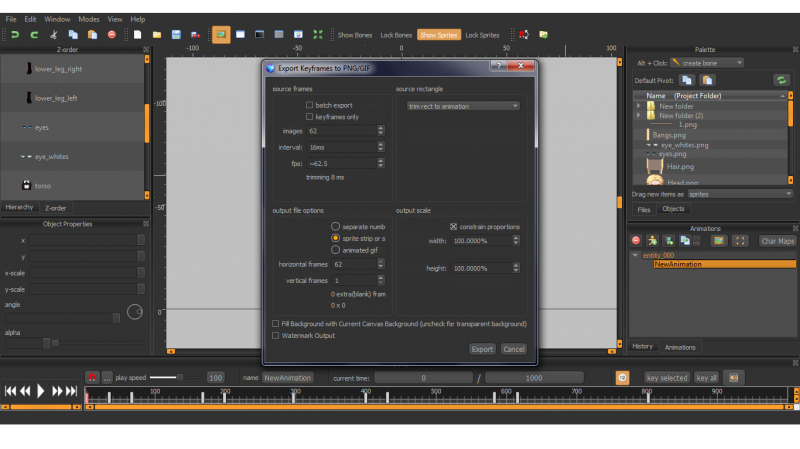
Push the play button to see how the whole animation looks like. If necessary make minor changes. Once you're satisfied, go to File--->Export as PNG/gif.
Make these changes. Now, click Export. You'll be asked where to save the image. If you go and see the image, you'll see that it is a big one. Mine is 1860 x 96. Don't get scared seeing the size though.The big size is what will help to make the smooth animation.
#0059b3">Step 5- Repeat repeat repeat
Repeat these steps to make animations for left, right (You can just make left and flip horizontally to make right) and up directions. Each will result in another wide strip of images.
#0059b3">Step 6- Fixing jagged pixels
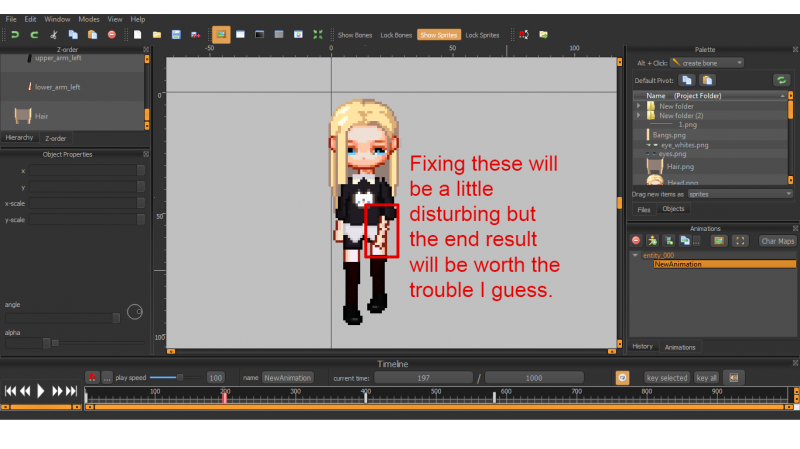
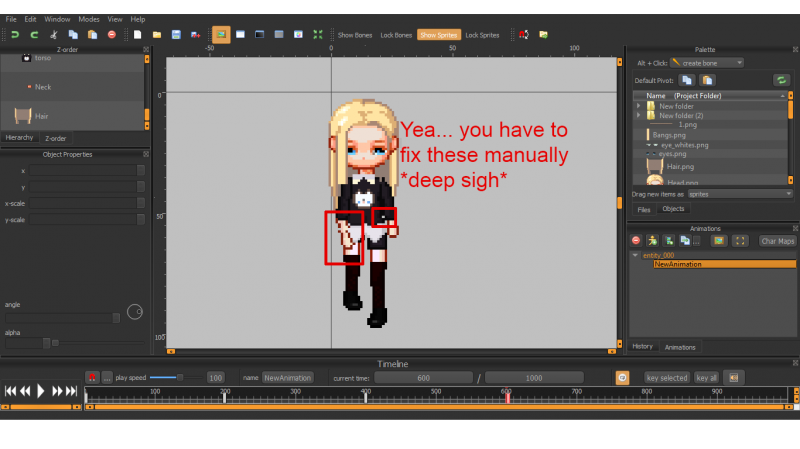
The rotation makes the pixels jagged up. Draw where there should be color and erase where shouldn't be. It's the worst part of this whole ordeal. Ugh.
#0059b3">Step 7- Making the sprite sheet
Make a new file in Photoshop. Width= width of the images, Height= height of the images x 4.
Now just paste them orderly- down, left, right, up. And there you have it! A sprite sheet... a very big one.
#0059b3">Step 8- Using it in the game
I recommend Galv's Character Frames plugin. In the plugin description, it's said that you should save the sprite sheet like MainHero%(8).png
However, if your sprite-sheet is for a single character, include $ in front of it. If your character's name is Harold, name is $Harold%(62).png (Because there are 62 columns. If you want less, you can change it in spriter's export options)
I'm very lazy so my animation looks very disgusting... But I'm sure you'll do a great job! Good luck!





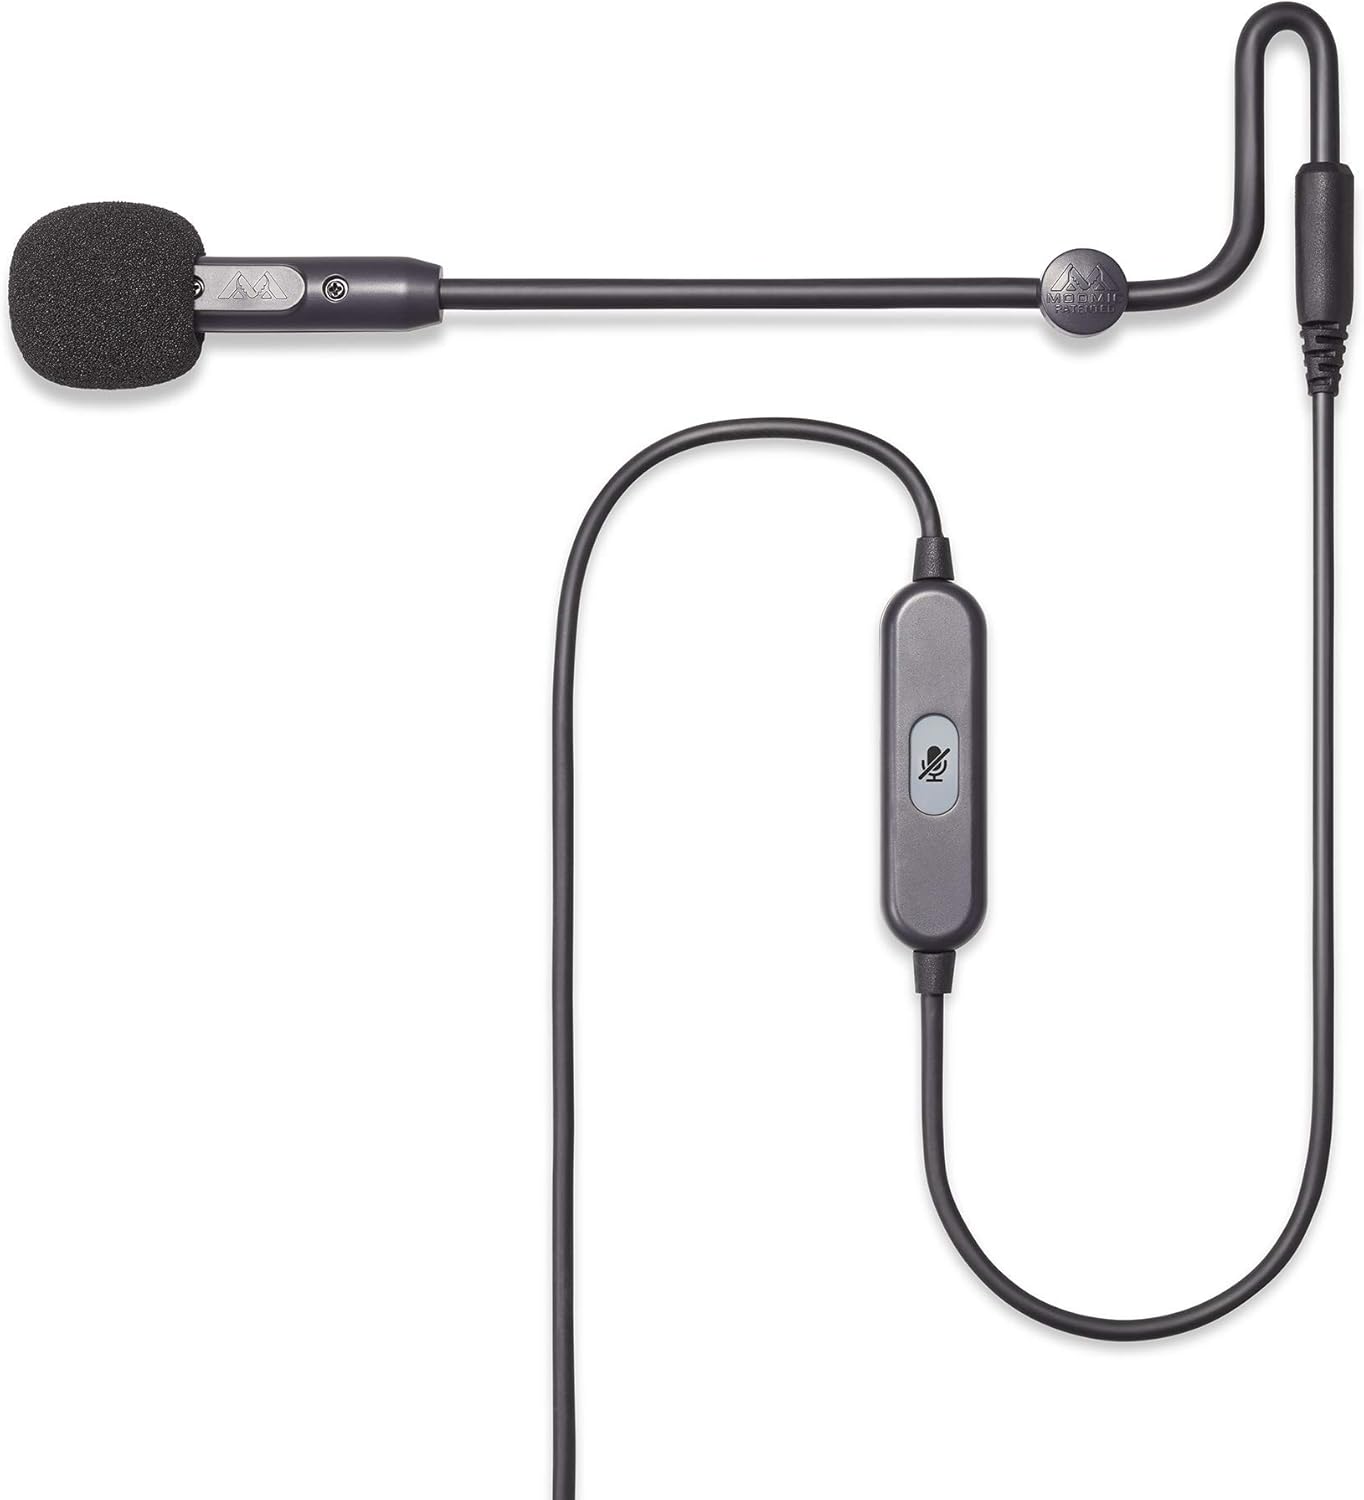 Antlion Audio ModMic USB Attachable Microphone
Attachable USB microphone that turns favorite headphones into a stream or chat headset.
View on Amazon
Antlion Audio ModMic USB Attachable Microphone
Attachable USB microphone that turns favorite headphones into a stream or chat headset.
View on Amazon