Using Floor Tiles Correctly.
BMM_Archive · July 16, 2026

Original Source
- Original title: Using Floor Tiles Correctly.
- Original author: padr81
- Original date: March 2, 2019
- Source thread: https://forums.rpgmakerweb.com/threads/using-floor-tiles-correctly.106302/
- Source forum path: Game Development Engines > RPG Maker Tutorials > RMMV Tutorials
Summary
Quick tutorial with video on using floor tiles correctly as I see them used wrong in many games and it makes the game look less professional. You will need to refer to the video to follow along. 1 - Understand the perspective view rpg maker give you. Example - see video at 0.09. This is incorrect use of floor tiles because from a top down view your carpets would not fill the room. So whats the problem?
Archived First Post
1 - Understand the perspective view rpg maker give you.
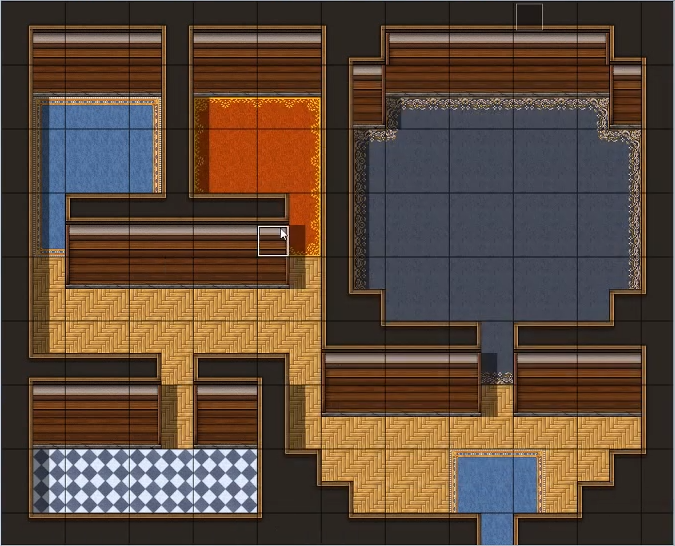
Example - see video at 0.09. This is incorrect use of floor tiles because from a top down view your carpets would not fill the room.
So whats the problem?
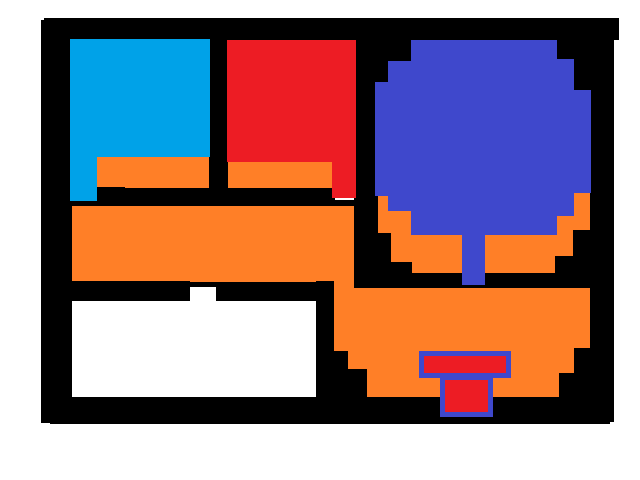
Well here is a crude top down view of the map we've just done from a top down perspective.
Protected download
Yup, putting the tiles in like that we are giving our carpets weird shapes and making our maps look worse because our eye will pick up on understand that something looks off (all those uncarpeted spaces) while we may not quite be able to put our finger on why our maps don't look as good as some of the better mappers.
2 - How do we go about fixing this?
Simple really, we have to map using shift mapping to make our carpets look like they are filling in the spaces missed when we simply auto tile.
Example at 0.17 in the video, I simply select the area I want to copy using the right mouse button.
2 seconds later at 0.19, I hold down "shift" and "left click" to paste the copied section.
What does holding down shift do? It pretty much tells the engine draw exactly what I've highlighted, do not auto tile, do not add shadows, draw exactly what is selected on screen.
I use that method until 0.26 in the video where I encounter a snag, I have no tile currently that looks like the carpet would look irl from that perspective.
A simple fix really. I make my map larger and sketch out a map using the floor tile I need that gives me the exact tile I need. See 0.40 in the video. I than highlight the tile with right mouse button than Shift and Left Click it into place.
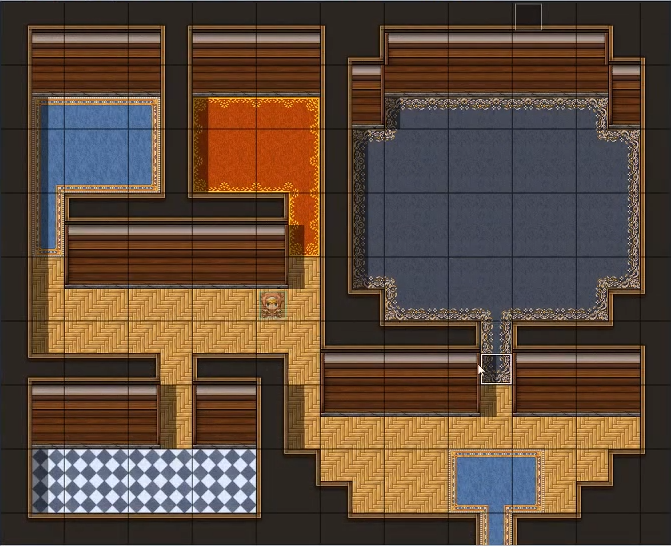
All my perspective issues are gone on said room.
I simply repeat the method for all room where the floor tiles look out of place.
3 - Final Product
Protected download
And here is before for reference. As you can see, a very simple fix to a map look much, much better.
Protected download
Downloads / Referenced Files
Log in, then follow the RPG Maker Developers Group to see these download links.
Log in to downloadReferenced Images / Attachments
Creator Claims / Removal
If you are the original creator and want this listing reassigned, edited, or removed, join BMMPlay and contact the moderators with proof that matches the original RPG Maker Web profile, linked GitHub, itch.io page, or another public creator identity.
Replies (0)
No replies yet.
Topic Summary
Loading summary...