Preserved forum archive. This topic stores the original first post and locally mirrored RPG Maker Web attachments when available. It is posted by the BMMPlay archive account, not by the original creator.
Original Source
- Original title: Easy Interior Doors Tutorial
- Original author: Bahamut20
- Original date: February 13, 2016
- Source thread: https://forums.rpgmakerweb.com/threads/easy-interior-doors-tutorial.56834/
- Source forum path: Game Development Engines > RPG Maker Tutorials > RMMV Tutorials
Summary
This is a small tutorial to make nice looking interior doors possible without too much hassle. { "lightbox_close": "Close", "lightbox_next": "Next",
Archived First Post
This is a small tutorial to make nice looking interior doors possible without too much hassle.
Protected download
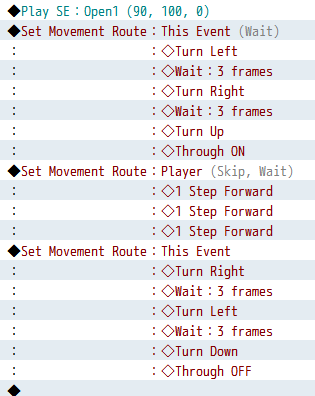
1. First, create a quick door event as normal, and modify it as folllows:
Protected download
For the door's trigger, it's up to you if you want to activate on touch (default) or action button.
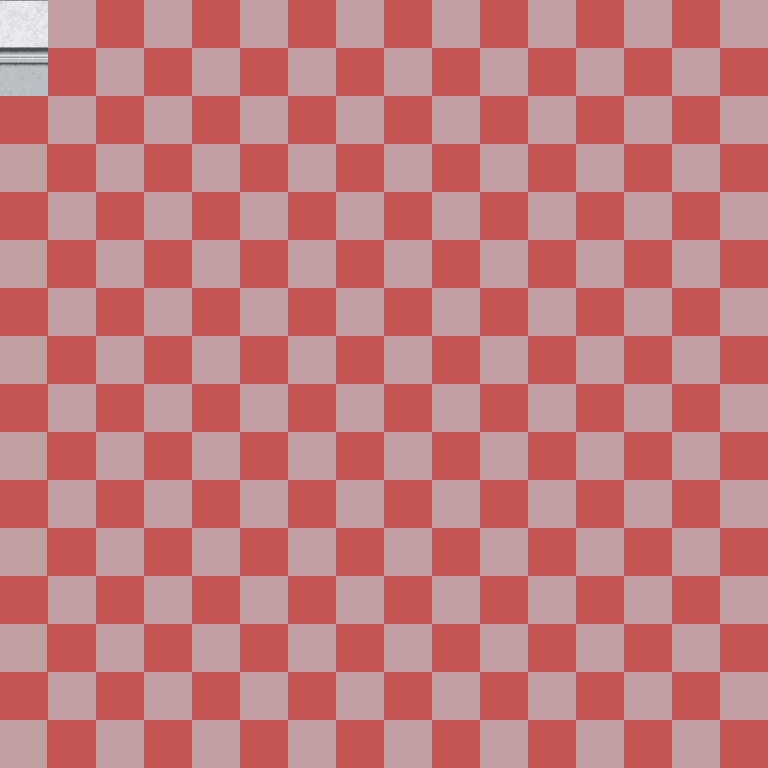
2. Then, you need to make a special tileset for the wall right above the door. For this, use Snipping Tool in your map (make sure scale is 1:1) to take a screenshot of the top of the wall. You can use a template like the following to properly align the screenshot:
Protected download
3. Go to the Database and put a star on the wall passability. Pick another tile and restrict passability to the left and right (so that the actor can only pass through it if facing up or down). We need a different tile because the star tile will be on top and the game will disregard its passability (unless you are using a Star Passability Fix plugin).
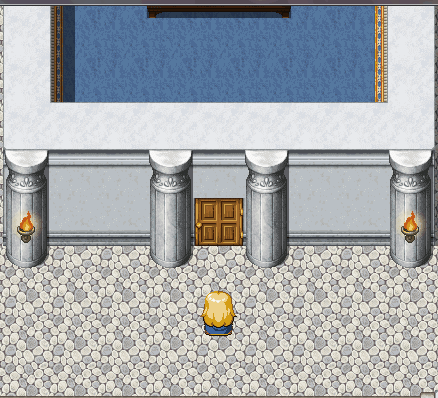
4. Go back to your map and use the "restriction tile" on top of the door. Then use the actual wall tiles on top of that.
5. It should work like a charm!
Protected download
1. First, create a quick door event as normal, and modify it as folllows:
Protected download
For the door's trigger, it's up to you if you want to activate on touch (default) or action button.
2. Then, you need to make a special tileset for the wall right above the door. For this, use Snipping Tool in your map (make sure scale is 1:1) to take a screenshot of the top of the wall. You can use a template like the following to properly align the screenshot:
Protected download
3. Go to the Database and put a star on the wall passability. Pick another tile and restrict passability to the left and right (so that the actor can only pass through it if facing up or down). We need a different tile because the star tile will be on top and the game will disregard its passability (unless you are using a Star Passability Fix plugin).
4. Go back to your map and use the "restriction tile" on top of the door. Then use the actual wall tiles on top of that.
5. It should work like a charm!
Downloads / Referenced Files
Log in to download
Log in, then follow the RPG Maker Developers Group to see these download links.
Log in to downloadReferenced Images / Attachments
Creator Claims / Removal
If you are the original creator and want this listing reassigned, edited, or removed, join BMMPlay and contact the moderators with proof that matches the original RPG Maker Web profile, linked GitHub, itch.io page, or another public creator identity.
Replies (0)
No replies yet.
0
replies
2
views
Topic Summary
Loading summary...